SEGA ST-V repair log #1

 PCB Repair Logs, Repair Logs  Comments Off on SEGA ST-V repair log #1
Apr 282011
 

First repair from the lot I recently got. Sega STV motherboard with Die Hard game.
When booted up with no game cartridge the board passed all it ROM and RAM tests. With a cartridge inserted the board crashes after the copyright screens. All the cartridge tests also came up as being good.
There is a developers test menu that is accessed by holding the TEST button down on power up of the board, this gives you access to a whole host of extra tests, one of them being a Sub-CPU test. Running this test flagged it up as being BAD and the board locks up.

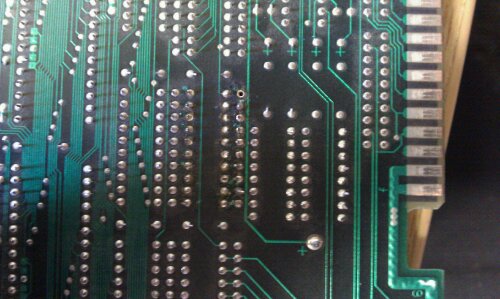
If I pushed down on IC2 (this is the Sub-CPU, an SH2) the board would pass its test.

This fault seems to be very common on STV motherboards and is easily fixed by reflowing solder on all the pins on the SH2 processors. I did both of them for good measure and the board now passes all its tests and the game boots up.


Not played this game before and its actually quite fun, like a mashup of Virtua Cop, Virtua Fighter and a little bit of Shenmue thrown in for good measure, it would make sense as the STV hardware is based on the Sega Saturn (or vice versa?).

Job lot of broken boards

 General  Comments Off on Job lot of broken boards
Apr 282011
 

Got a box of broken boards from a guy on the Jamma+ forums.
Included are:
Rastan Saga – white screen
Hot Shots Tennis – constantly resets
Mortal Kombat – messed up controls
Seibu Soccer (Seibu) – no sound, very low
Karate Champ – non jamma pinout, looks clean though
Taito F3 Motherboard – no game to test it
X-Men Vs Streetfighter – Working
Sega STV Titan Motherboard + Die Hard Arcade – games dont load
Two Crude – all the ROMs are missing
Street Fighter 2 – bootleg – intermittently working
Another Street Fighter 2 bootleg – Dead, all roms and rams are dead, not worth fixing

The X-Men vs Streetfighter board is fully working and even has a working battery.
The SF2 bootleg is intermittently working, looks like the M5 bootleg.
All the other boards have the fault the guy stated.
Im pretty pleased with this lot.

 Posted by at 5:17 pm

Fluke 9010a Ver 3A upgrade

 Downloads  Comments Off on Fluke 9010a Ver 3A upgrade
Apr 272011
 

While I had the Fluke opened up today, thought I might as well install the upgraded ROMs, not sure why just felt the need to.
The ROMs that are available online for version 3A are doubled up into 3 x 16k files, to be installed I needed to split these files and match them up to the originals.
Here is the .ZIP file with all the split ROMs labelled properly.

Fluke 9010a v3A Files

 Posted by at 4:29 pm

SEGA Naomi super capacitor

 General  Comments Off on SEGA Naomi super capacitor
Apr 252011
 

The Naomi has a 0.1F super capacitor on board labelled C29, in between the button cell battery and the 8 pin DIP labelled 315-6188. This capacitor is a usual suspect on a broken board as it is prone to leaking and damaging the traces to the serial EEPROM. If you own a Naomi board (not sure if it applies to the Naomi 2) you should check the condition of this cap and replace it.
The capacitors can be ordered from the link below:

Mouser

 Posted by at 4:42 pm

Retrobright attempt

 General  Comments Off on Retrobright attempt
Apr 222011
 

After reading a simple guide by 1200xl over on the RCM forum, I decided to give this retrobrighting thing a go.
Retrobrighting is a process of removing the yellowing that tends to occur on old plastics. I’ll not go into the science behind it cause i don’t really know it.
As a test subject I used the casing of one of my Fluke 9010a pods.

I ordered some peroxide online and this Saturday was the ideal day to try as to make this work, sunlight is required.
Apply a nice thick coating of the peroxide to the washed down plastic and wrap it in clingfilm, then place it in the sun for a few hours turning it every so often to get all sides.
Probably should mention that rubber gloves are a must for this job as the peroxide doesn’t feel good on bare skin!
After its been roasted, remove the clingfilm and wash off the peroxide and let the plastic dry.

Pleased with the results for a first attempt and have since don’t the body of the Fluke with better results.
I was advised to apply a UV treatment after this as the yellowing will return but at this point I haven’t got any. I’ll get some ordered though.
Will no doubt have more stuff to do in the future.