Added the pal @1A on the B-Board for the USA/Euro version of Mega Twins
Mega Twins pal CK24B added
PAL Updates
Comments Off on Mega Twins pal CK24B added
Mar 252015

Added the pal @1A on the B-Board for the USA/Euro version of Mega Twins
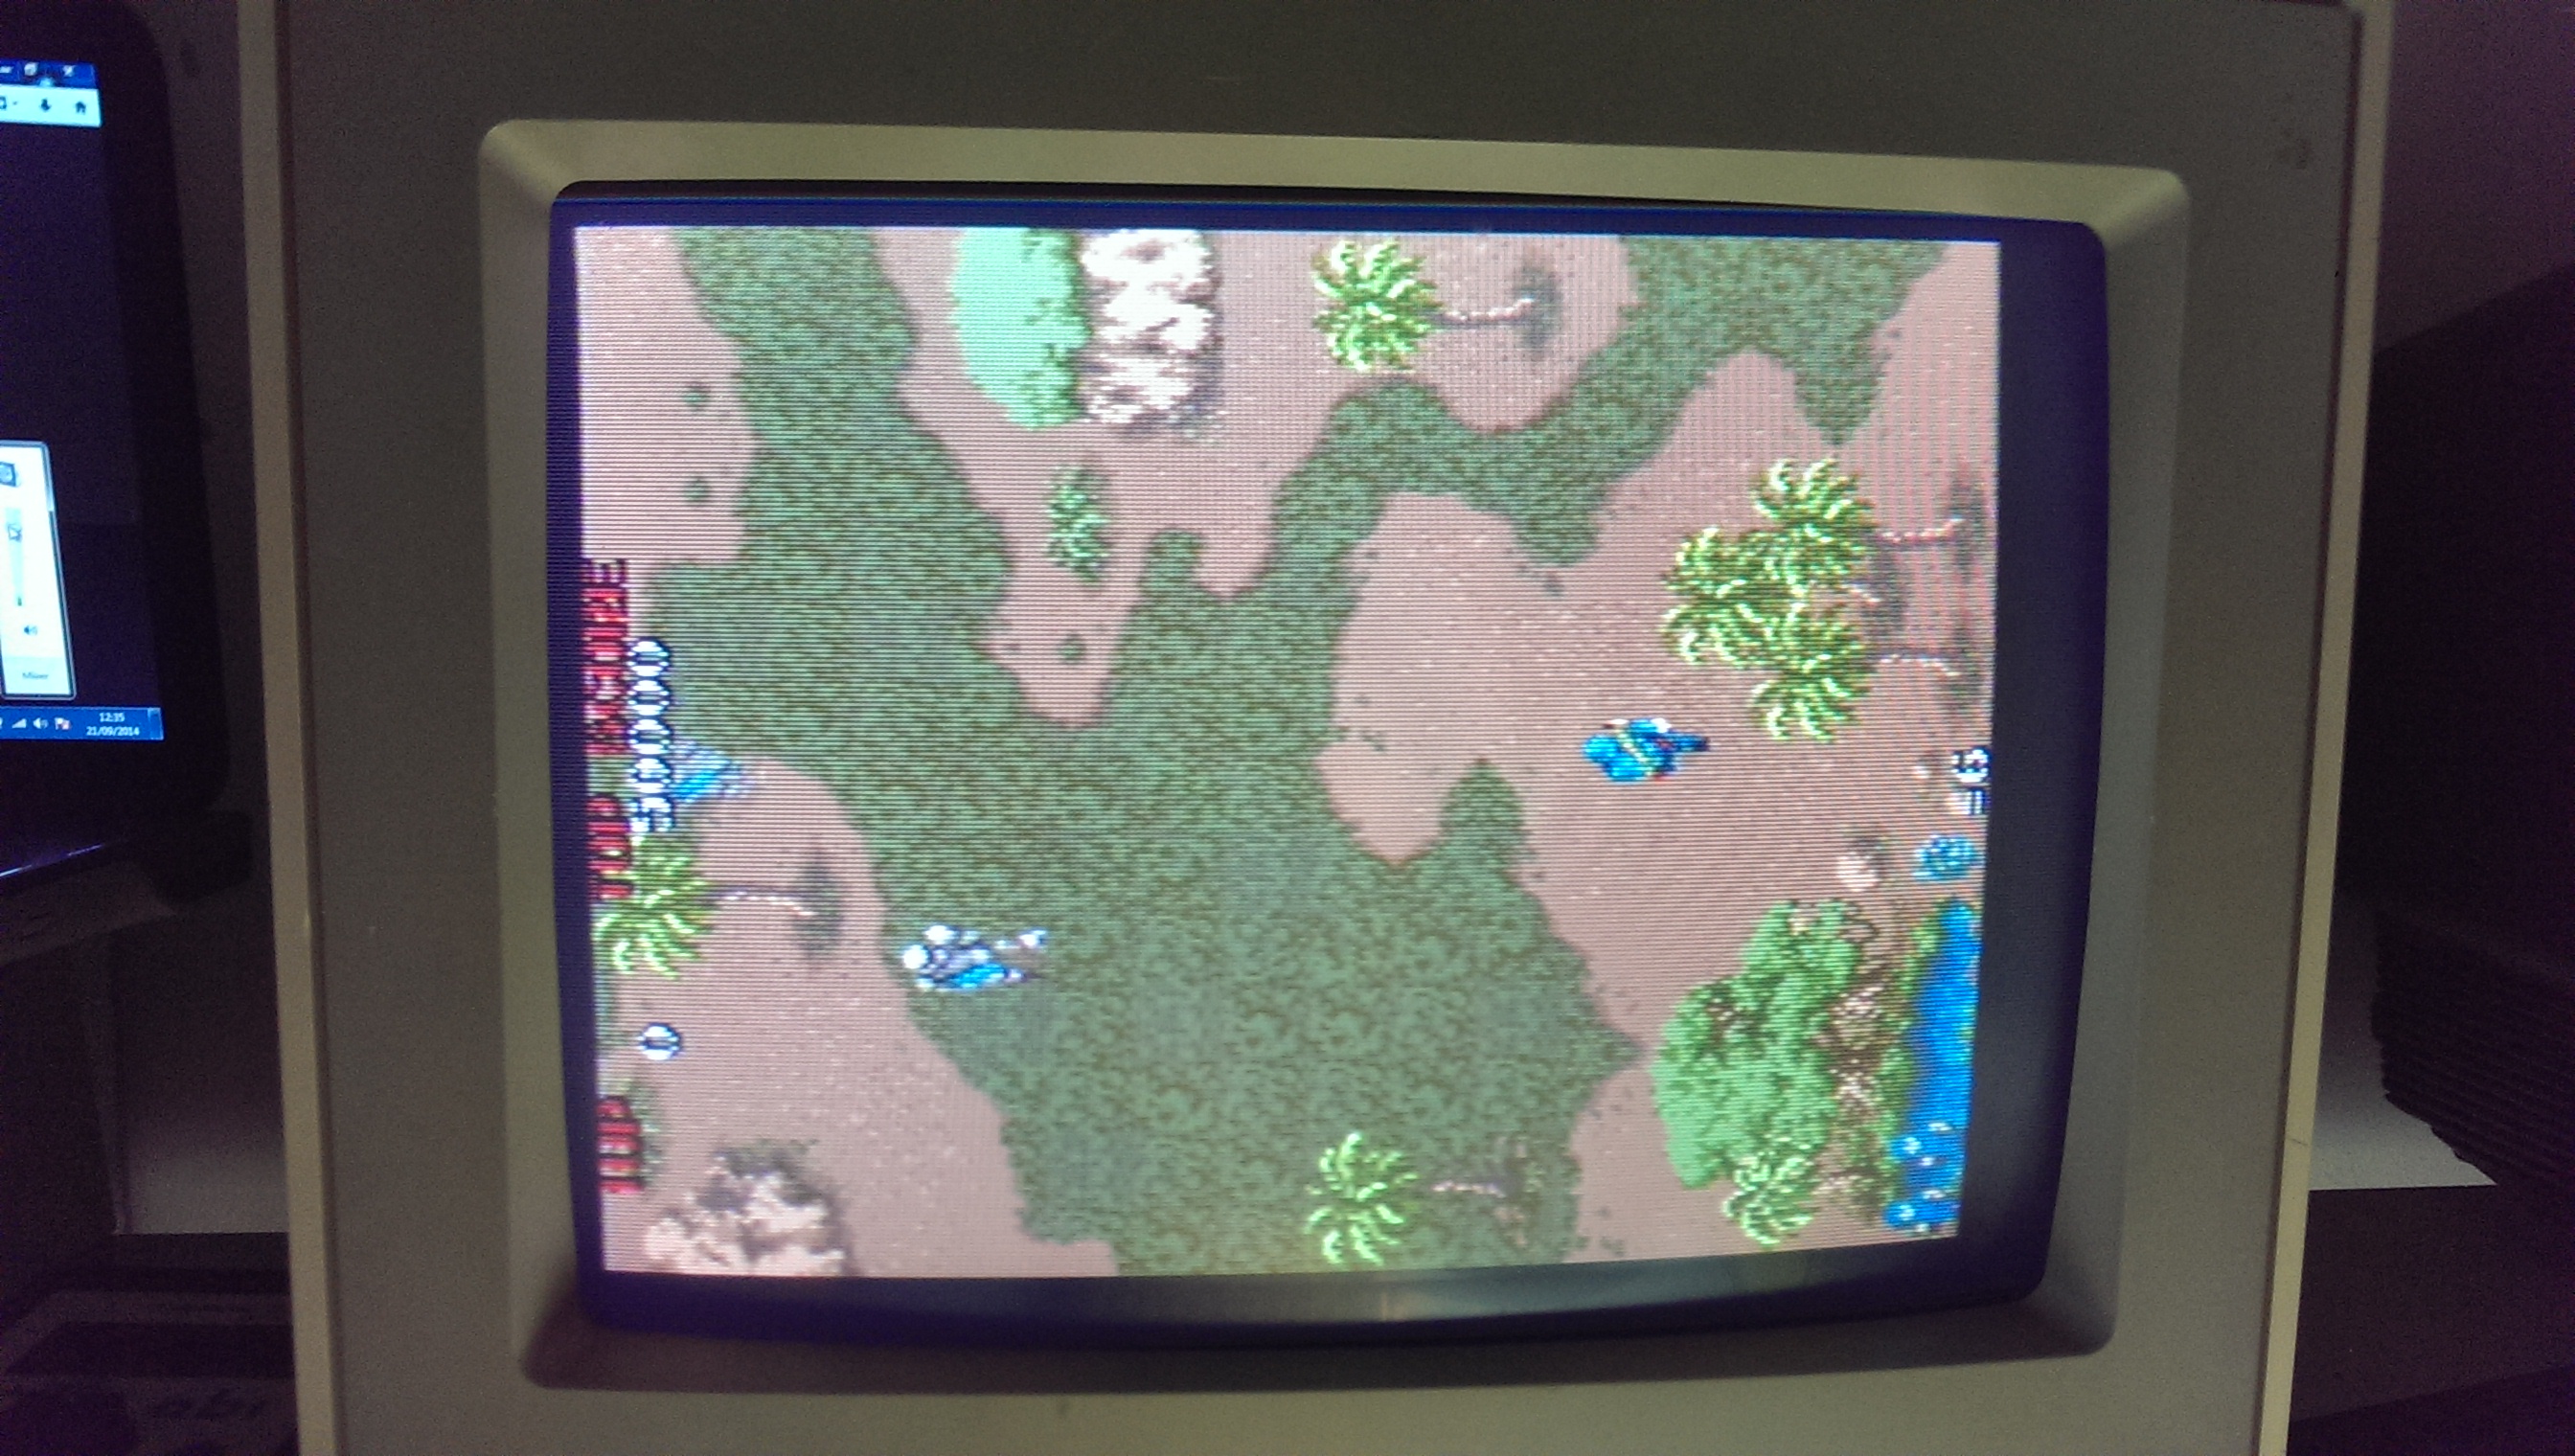
Welcome to my first repair log!
I bought this (very) expensive pcb from ebay in October 2014.
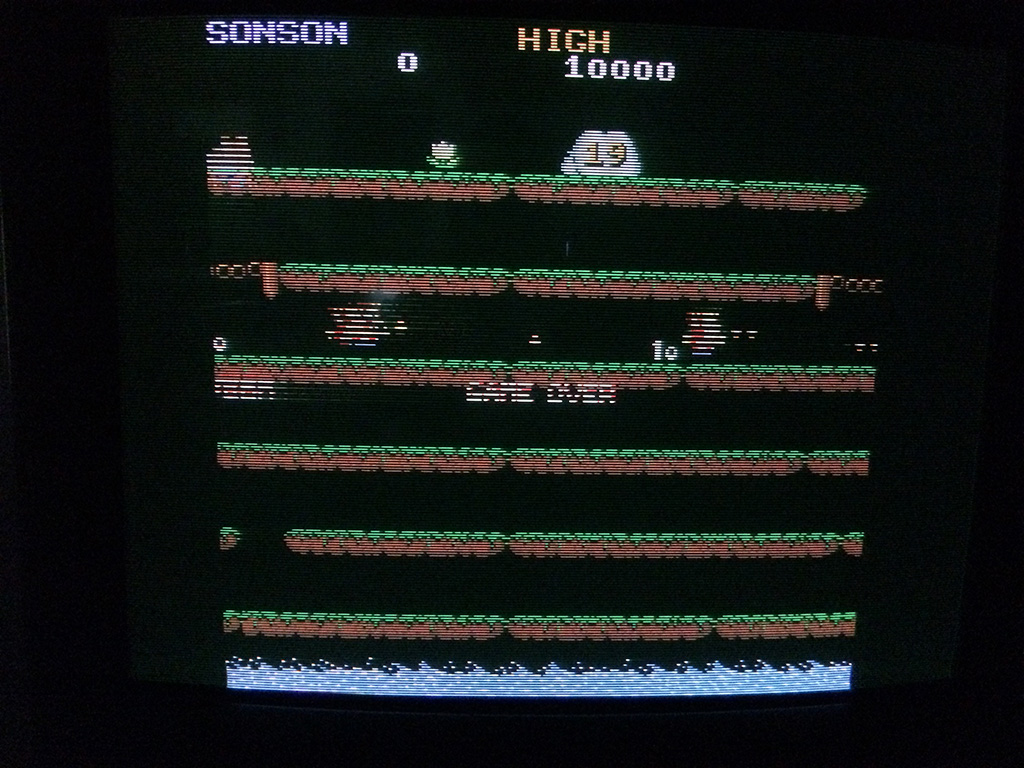
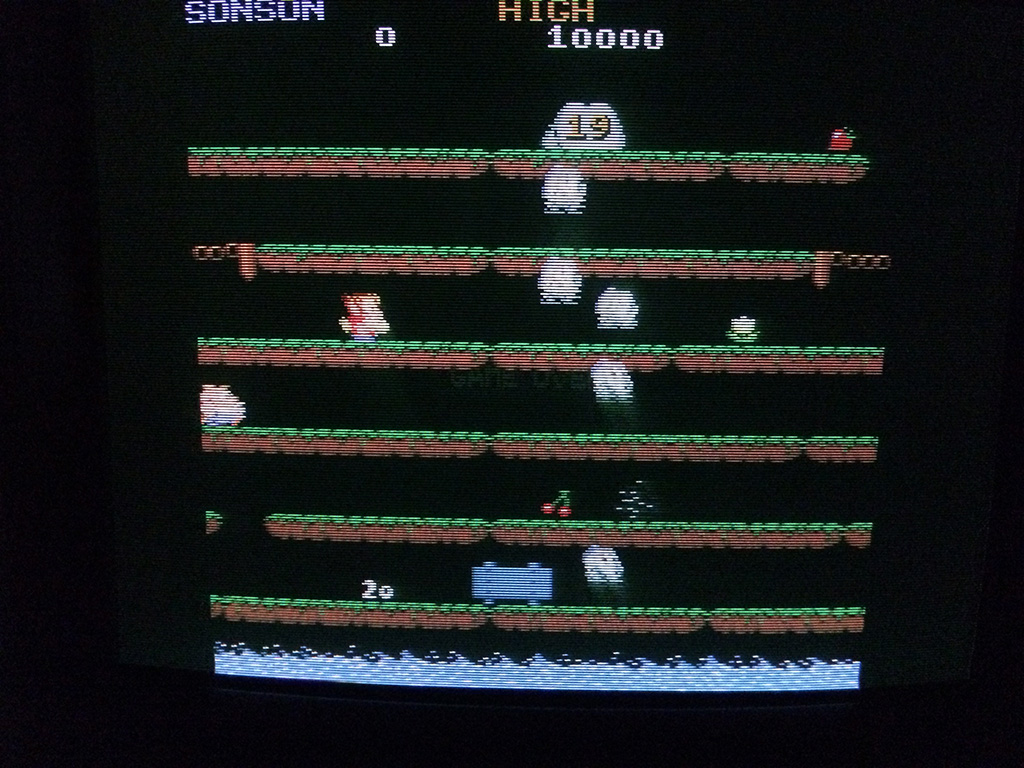
I played the game a couple of times and then after about one week, all the sprites disappeared while I was playing. Only background and text were present:
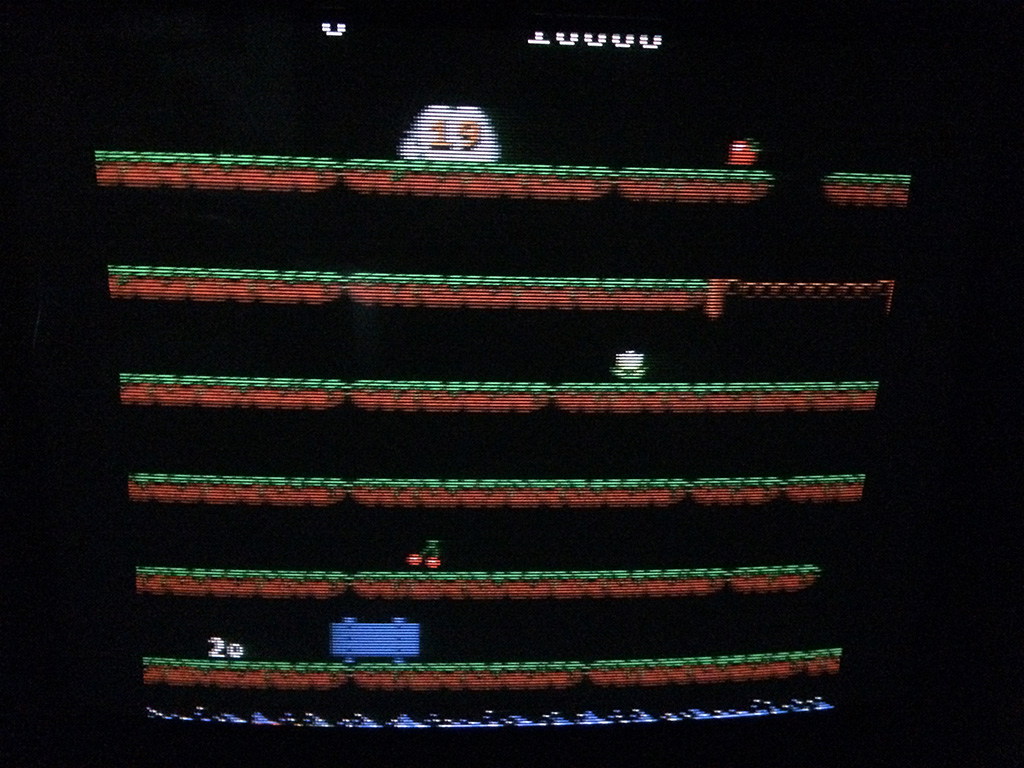
I couldn’t believe, at first I began to press everywhere hoping it was a loose or oxydized connector but soon I realized something got faulty.
This game hasn’t any schematics available so I knew from the beginning it would have been very tough to fix it.
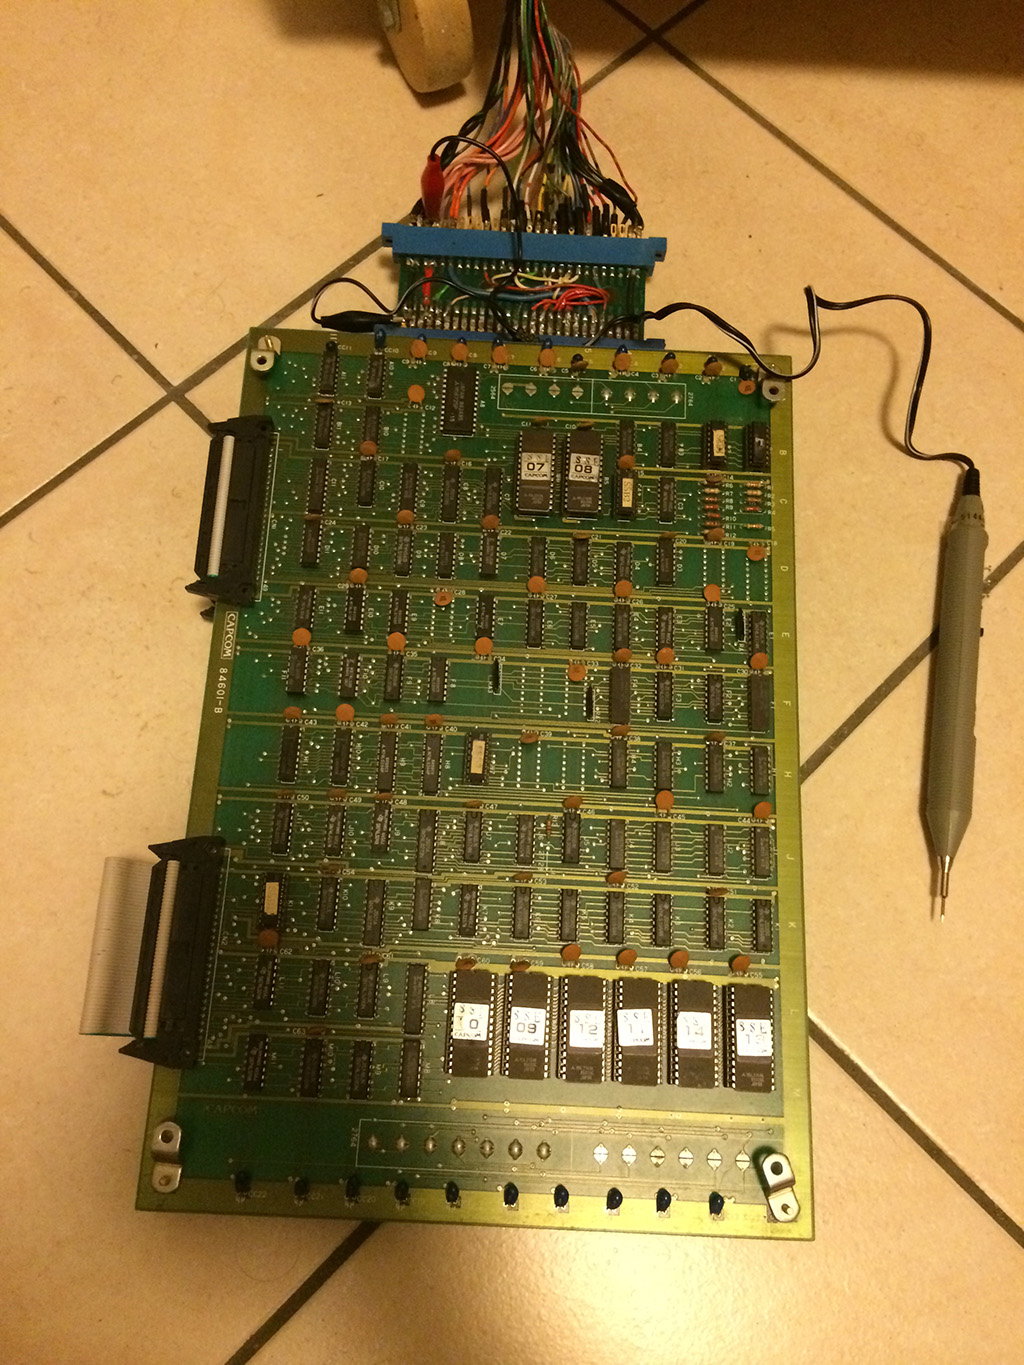
I connected my trusty logic probe and began to short some pins on the pcb to see what changed on the screen so that I could focus on the right part of the circuit.
After about 30 mins turned on, the sprites started to reapper but missing some lines:
I then remembered that 1942 hardware is very similar to Son Son and the schematics are available.
I was right, the way that TTL chips are connected on 1942 is equal on Son Son. Only the positions of the ICs are different but the logic is really similar.
I probed the 2148 rams @F2 and @F4 on Son Son pcb which on 1942 schematics are described as OBJ rams and I found a stuck /WR signal @F4 on Son Son (J4 on 1942):
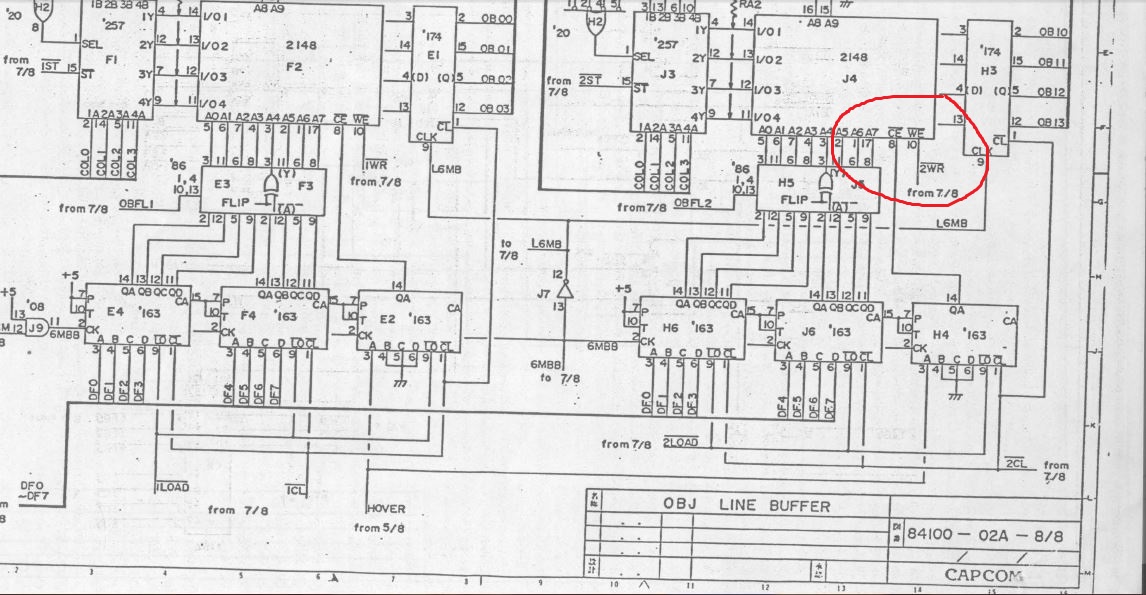
I followed back the signal always taking a look on 1942 schematics, and I found finally the source of the problems on the missing signal on pin 11 of an 74LS00 @F11 (on 1942 I circled the equivalent IC @K11).
On 1942 schematics available on internet, someone circled the 74LS00@N8 writing “no plane”, probably he had the same fault. 😉
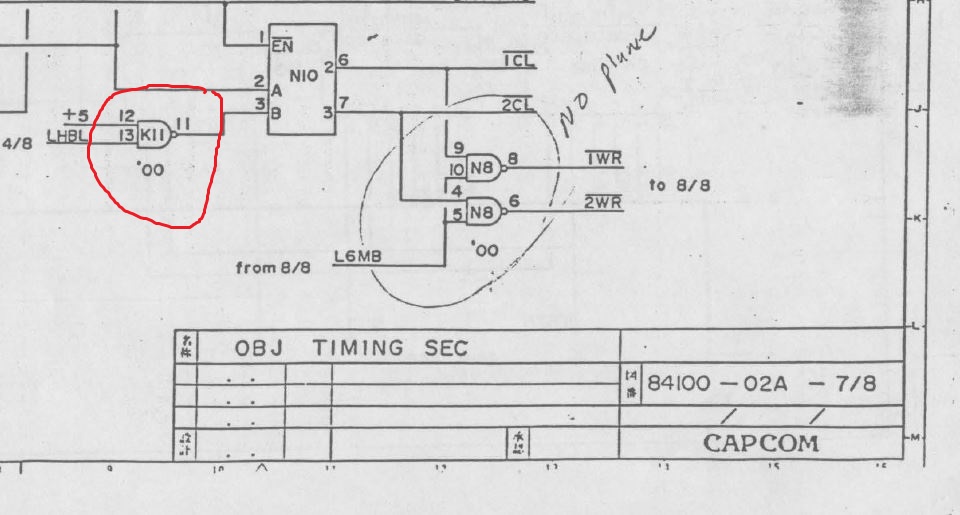
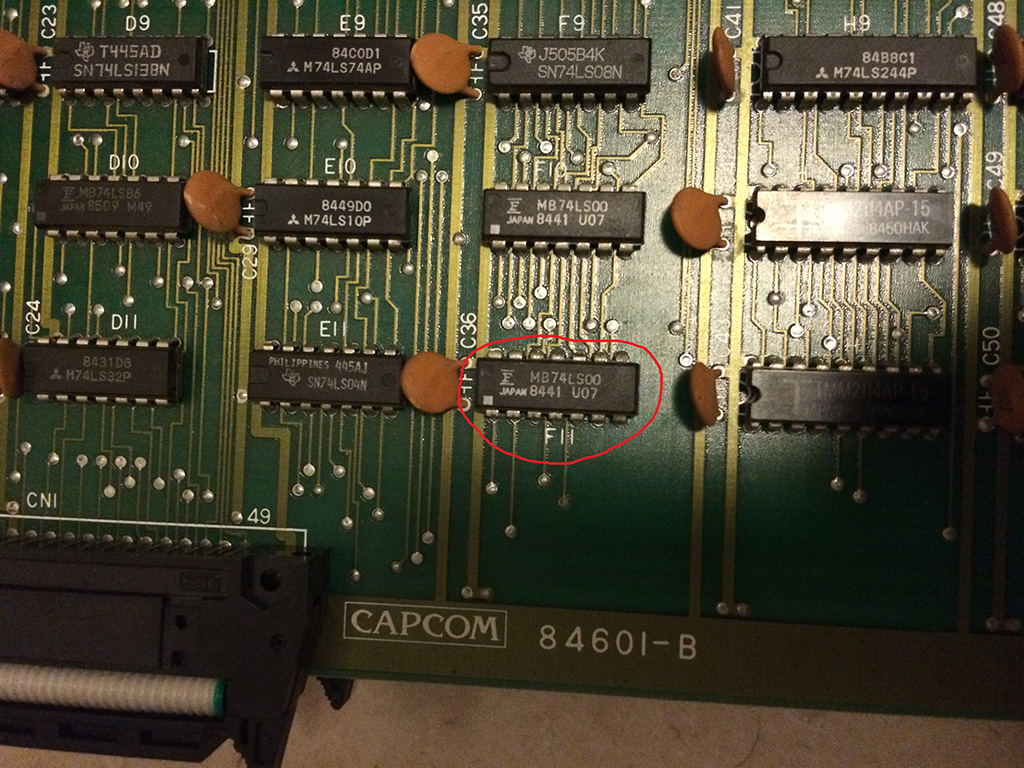
Replacing the 74LS00@F11 gave me back all the sprites
Another one of Ben’s boards.
Had the usual graphics issues you normally get associated with those four 2114 RAM’s only this time the RAM’s had already been replaced and all four were good.
Following the inputs and outputs from these RAM chips I found some broken traces, probably a result of desoldering them originally.
Pin 1 of the RAM at location 3H was not connected to anything. I patched this and it fixed the solider sprite on the title screen but some in-game graphics were all messed up.
After confirming all other connections were good I noticed two other 2114 RAM chips that had been worked one and socketed so I checked those too.
Initially I found pins 3 and 4 of the RAM chip at 1B. Patching these gave me this result
Getting there but not quite.
A little further inspecting these chips and I also found pin 15 of the same chip not connected to GND like it should be.
Patching this one gave me a perfectly working game.
Whilst soak testing the Commando board I had recently repaired for someone 2 bad things happened.
First the music disappeared
Second the pictures vanished.
I checked the RGB outputs with the scope and the signals looked a little weak but should be fine. I checked the SYNC signal and this was stuck HIGH.
Followed the signal back from the edge connector to a 74LS138 IC @ location 5L and the outputs on pins 3 and 4 were both stuck at just under 1v according to the scope.

The inputs to the IC were fine. I piggy backed a working LS138 and the picture came back normal.
The sound fault was fairly simple too.
The first thing I did was check the RESET and HALT lines on the Z80 CPU. These were fine and not stopping operation. Next I checked the clock signals on the Z80 and the Yamaha 2203’s. The Z80 was fine but there was nothing on the 2203’s.
The clock signal for these 2 come from a nearby 74LS74 IC who’s outputs were obviously dead but all the inputs were “as schematic”. I pulled this and testing it, it failed and a replacement has restored the sound fully.
Finally this is in good health once again and hopefully it will stay that way for a while longer, although with the amount of Fujitsu TTL IC’s on the board I very much doubt that but it is 26 years old now!
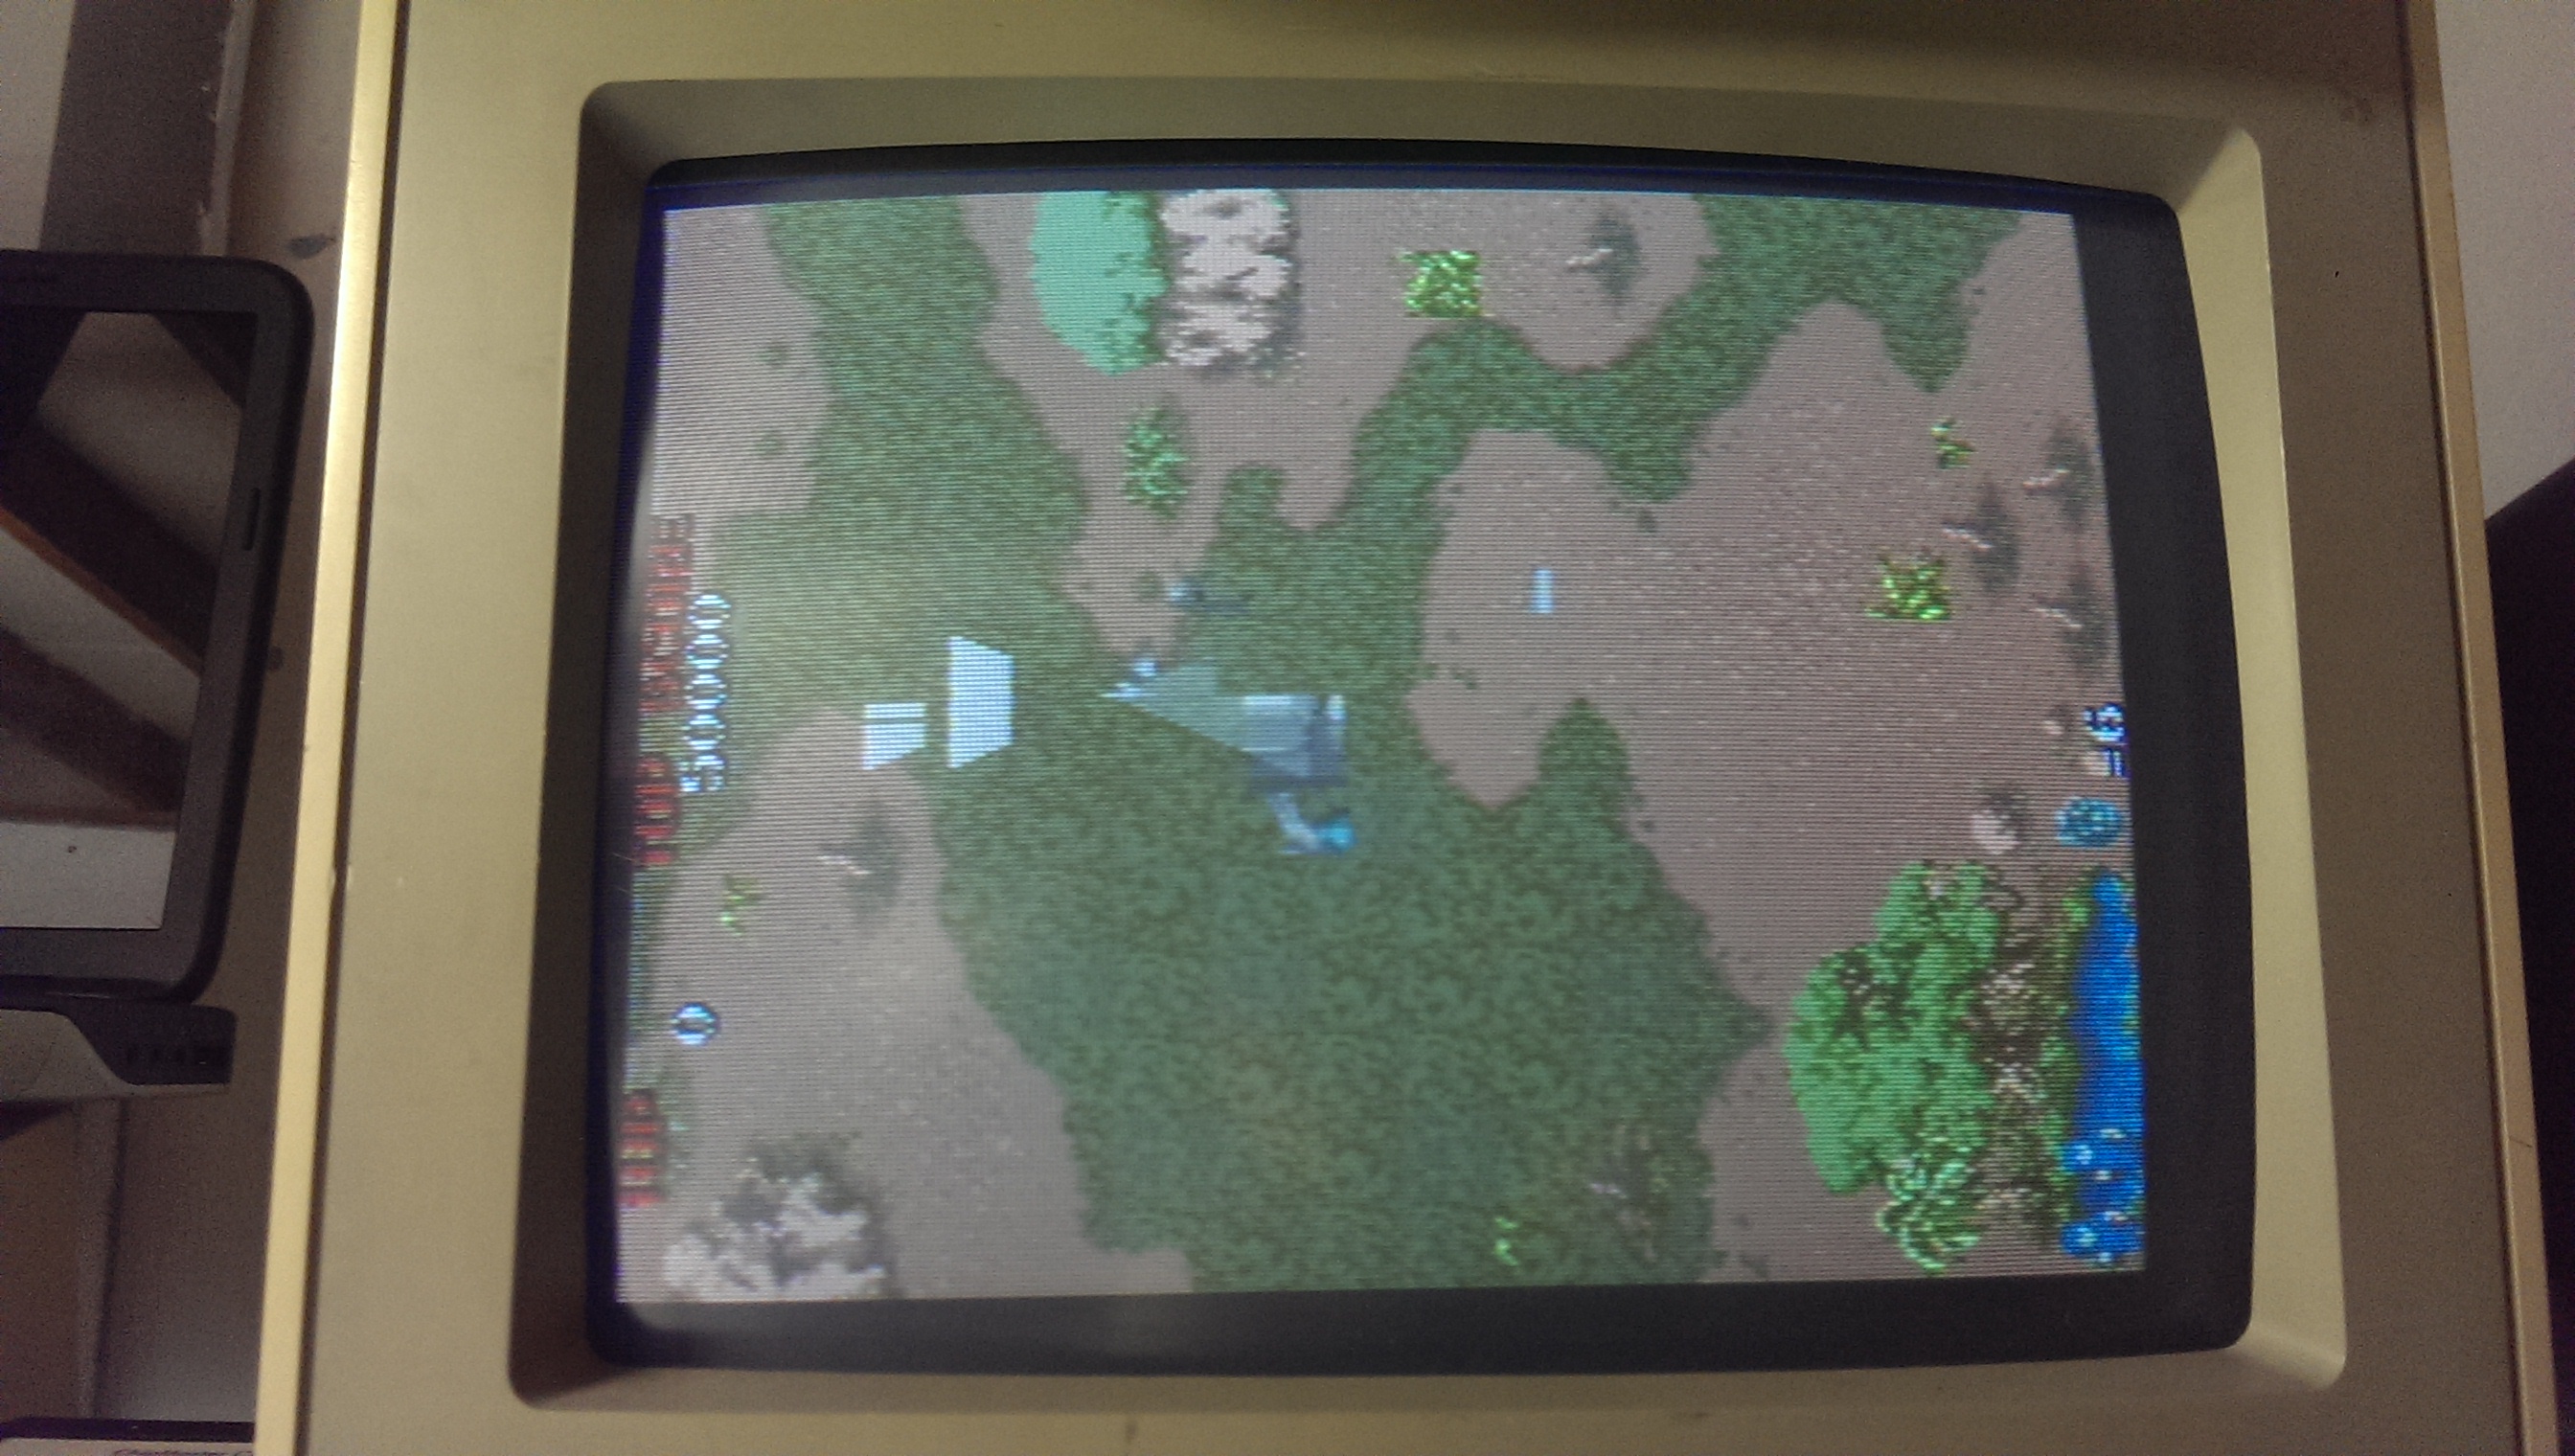
Got sent a Commando board for repair a while back and have finally got around to giving it a test.
I spent a little time going over the board doing the visual inspection prior to booting up. On the bottom board a 74LS245 had been removed and was just sitting in the board loose but most of the traces going to the IC had also been lifted, I suspect during a bodged removal.

I refitted the IC (after testing it), cut the lifted tracks off the board and ran some kynar to the relevant points.
After spending a bit of time making another adapter up to run the game I saw the graphics fault.
All the sprites were barely visible and sometimes were gone completely.
There was also some corruption on one of the screens.


The manual for this game is online and in the back of this are the schematics for the game. Nice. Also, as its CAPCOM, the schematics are nicely split and labelled up in sections.
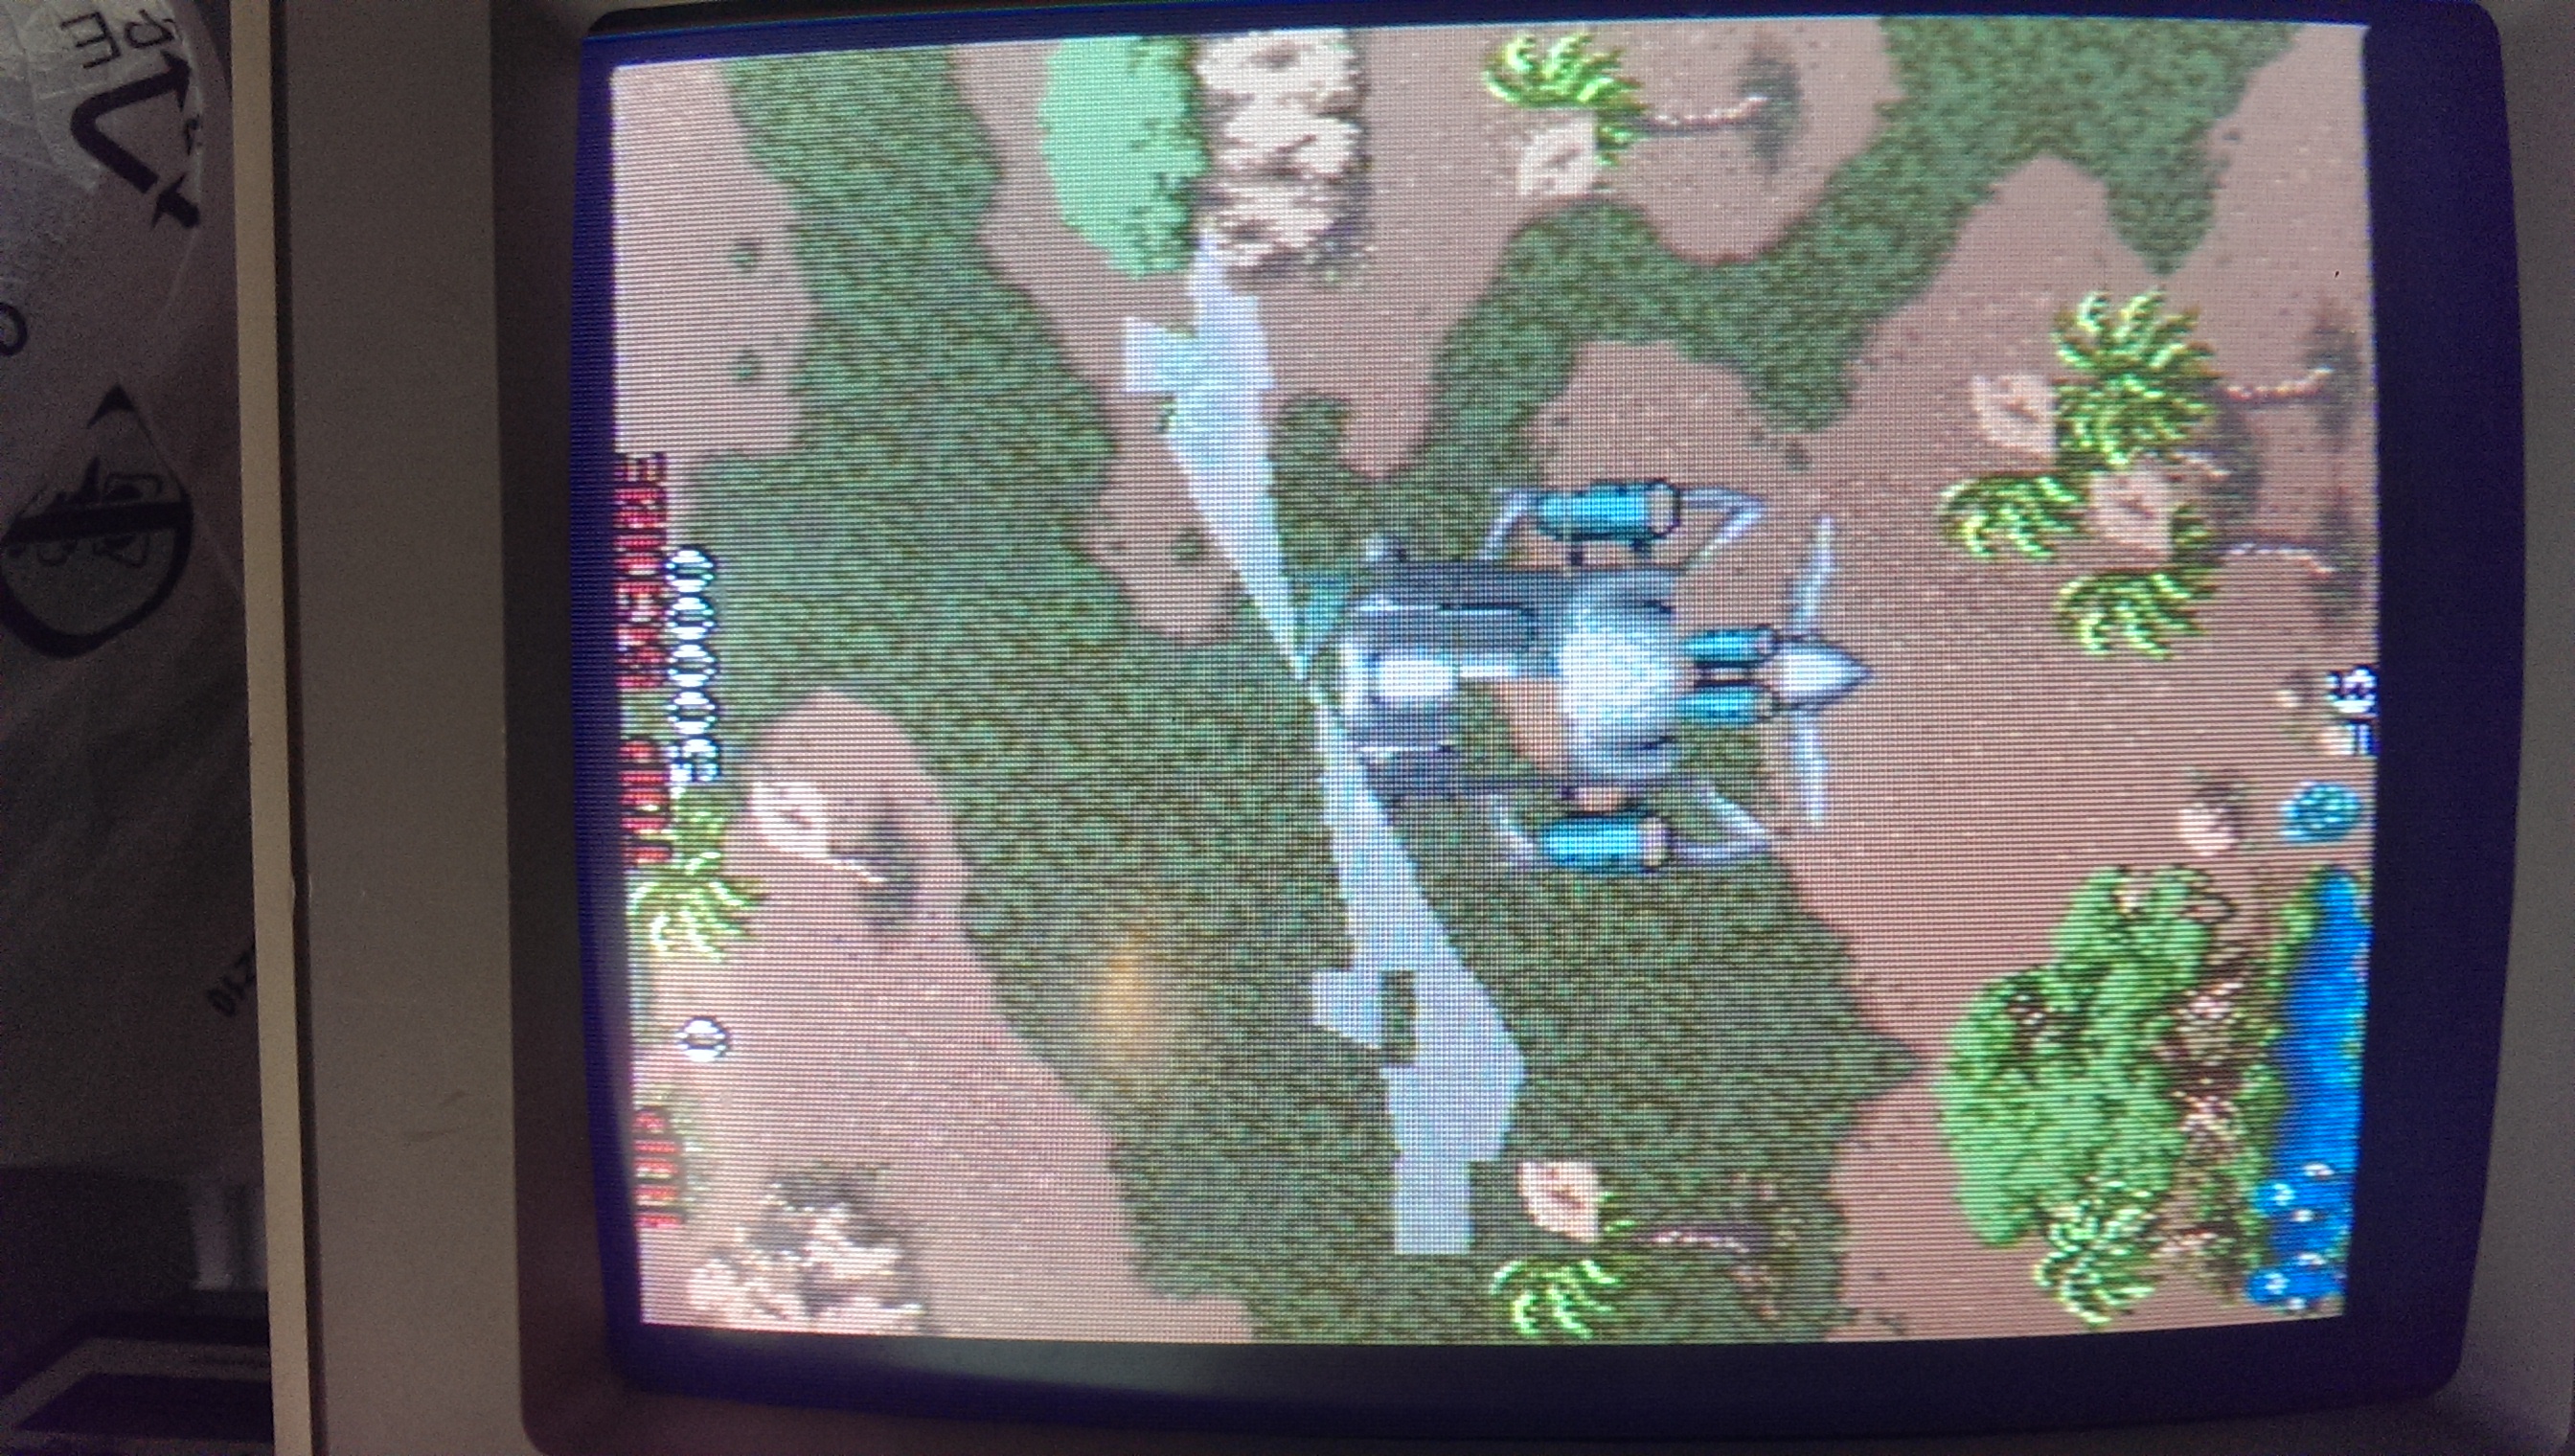
After seeing the fault I was convinced that RAM was to blame. I scoped a section of 4 x 2114 RAM chips on the lower board. All had good looking address lines but the data lines looked very odd like they were struggling to drive the lines low. I interrupted a couple of pins and graphics started to come back so I pulled it and testing it, FAIL. One replacing the RAM only half the sprites came back with jail-bars running through them. I ended up pulling 3 in total which was quite lucky as I ran out of RAM replacements.
All graphics are now returned to normal.

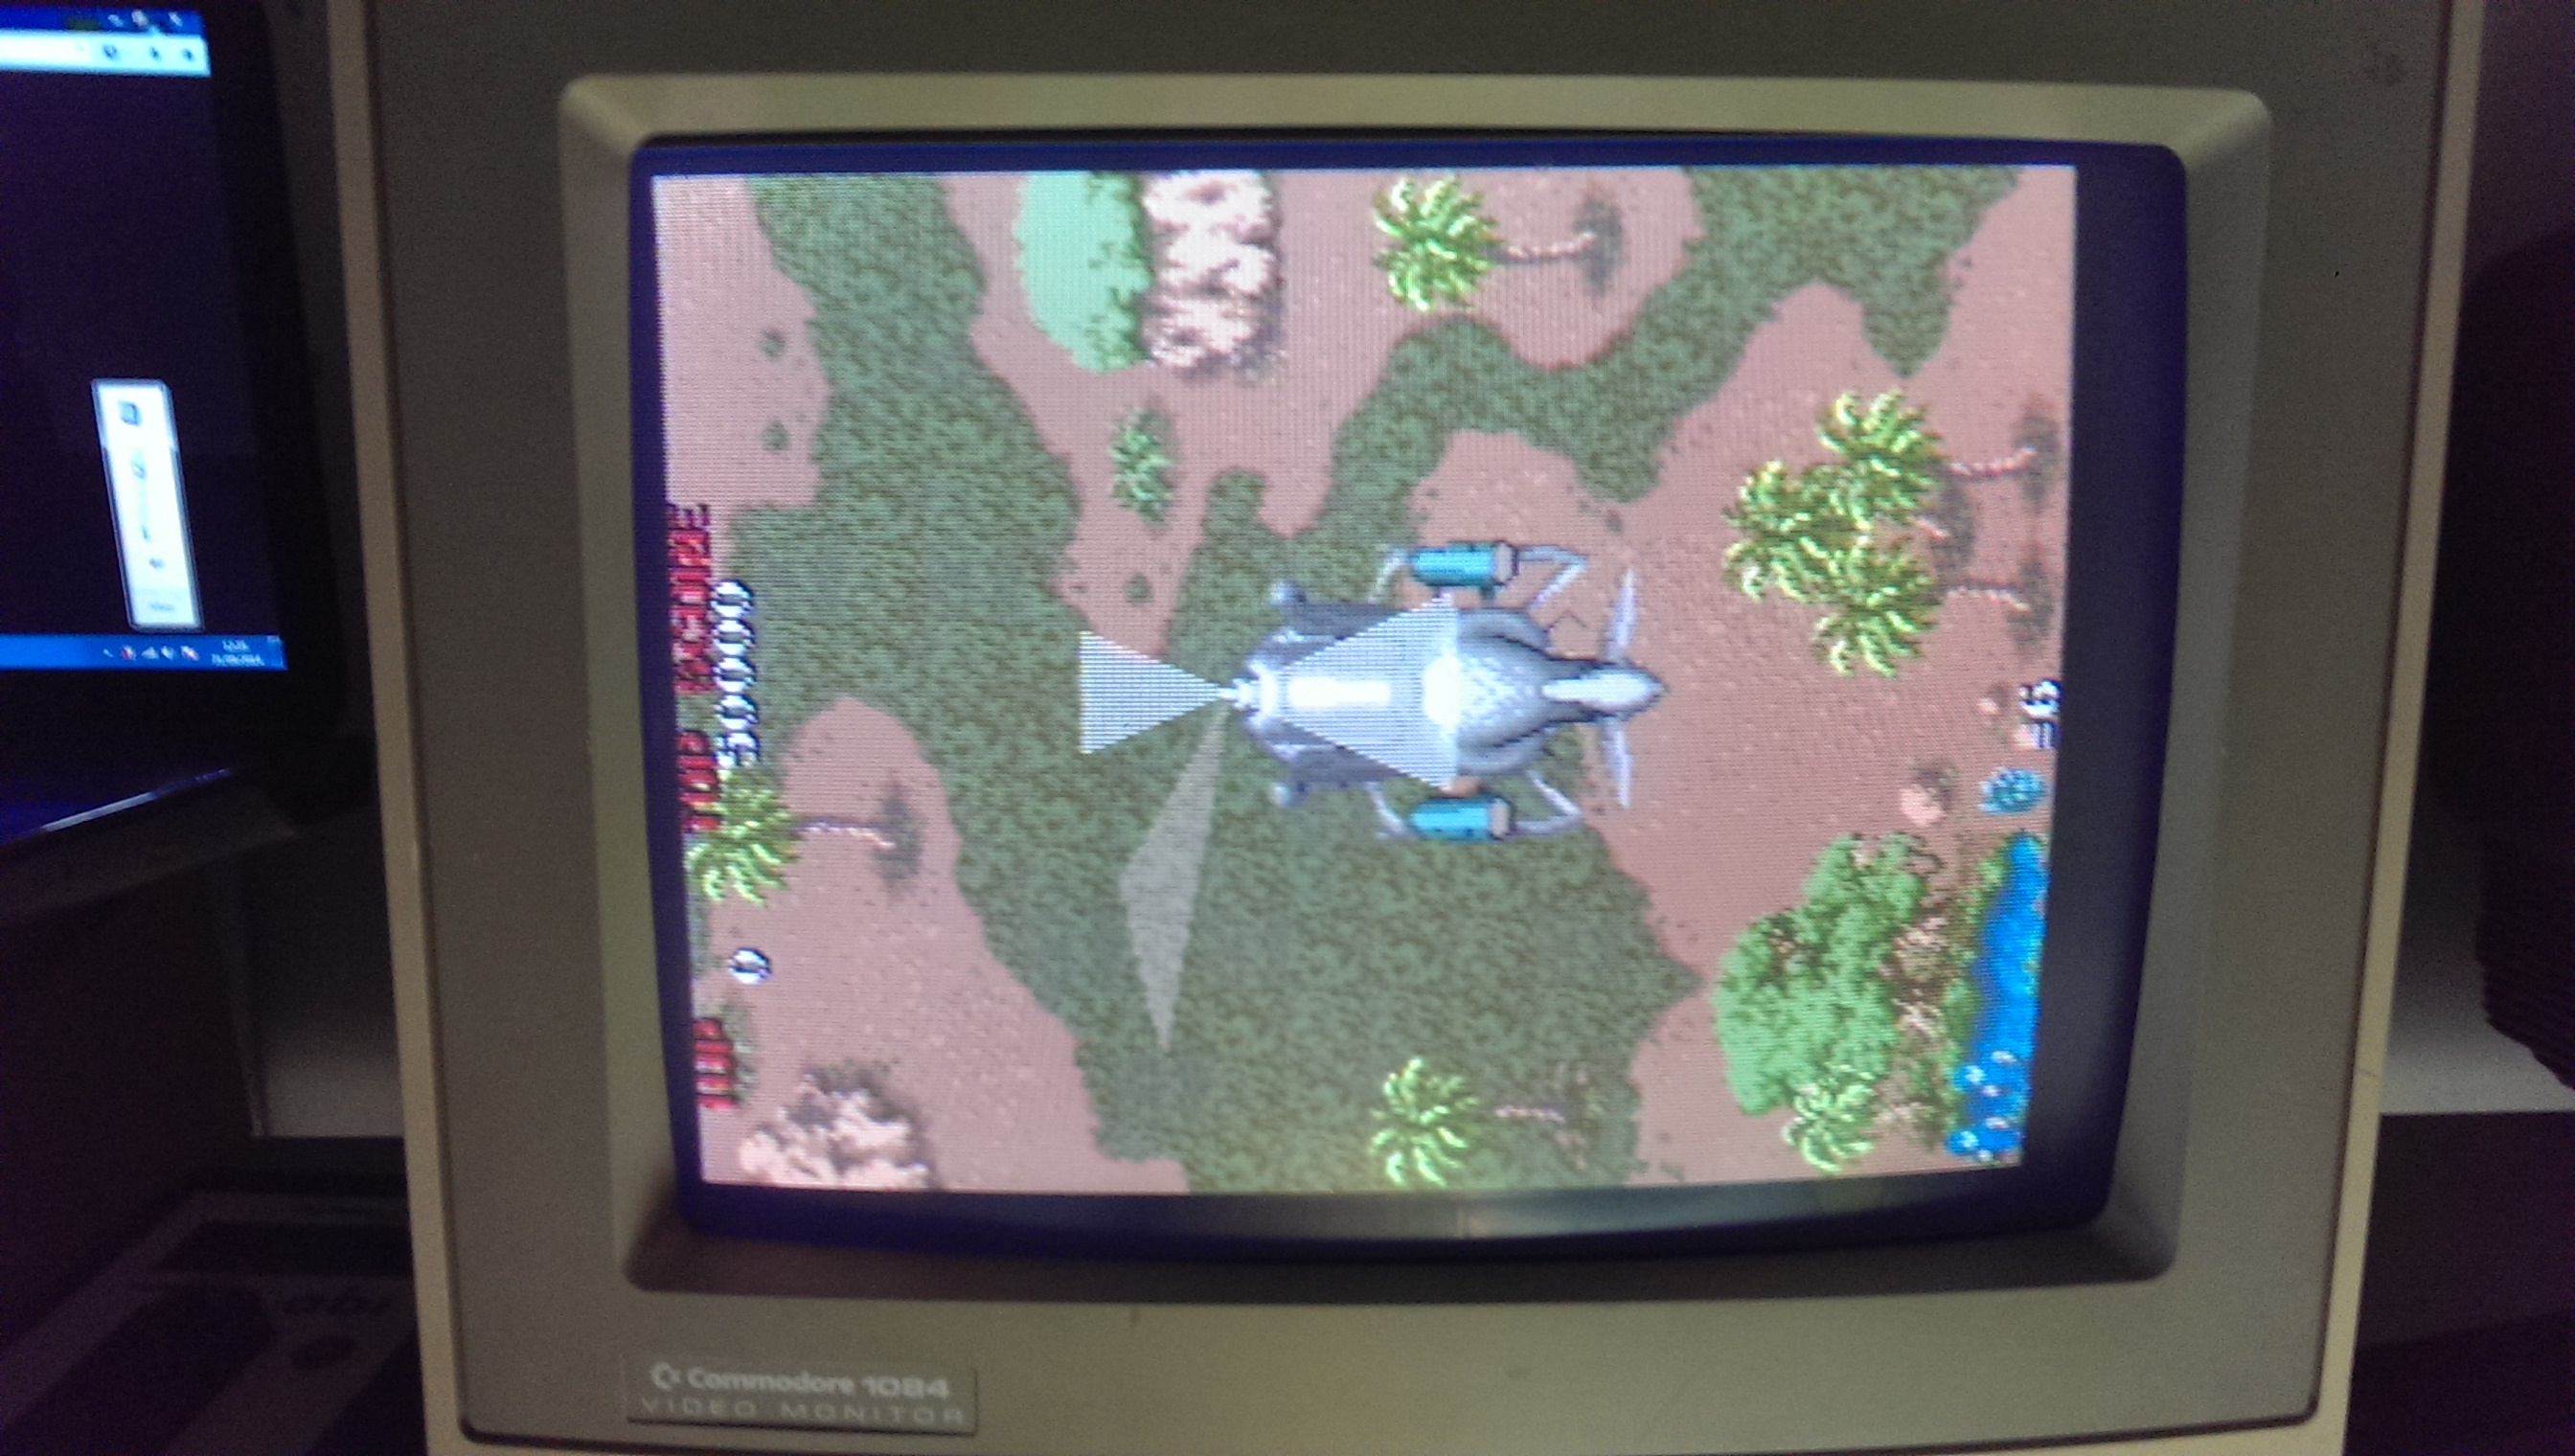
As for the corruption on the screen. Thanks to MAME I was able to determine this to be an unused part of the screen that my RGB to VGA converter decided to throw in there to confuse me. In a cabinet the screen would be adjusted to remove these borders.