Taking my new found interest in all things Sinclair a little further I have got hold of a copy of this book.
From what little Ive read so far its seems very interesting and about my level too.

Taking my new found interest in all things Sinclair a little further I have got hold of a copy of this book.
From what little Ive read so far its seems very interesting and about my level too.
So I made my first FPGA program for the LCD on the dev board. I found this amazingly hard work as the whole VHDL programming seems unnecessarily difficult and good tutorials are limited and undescriptive.
Still, here it is:

Got myself a couple of these SID replacements today.
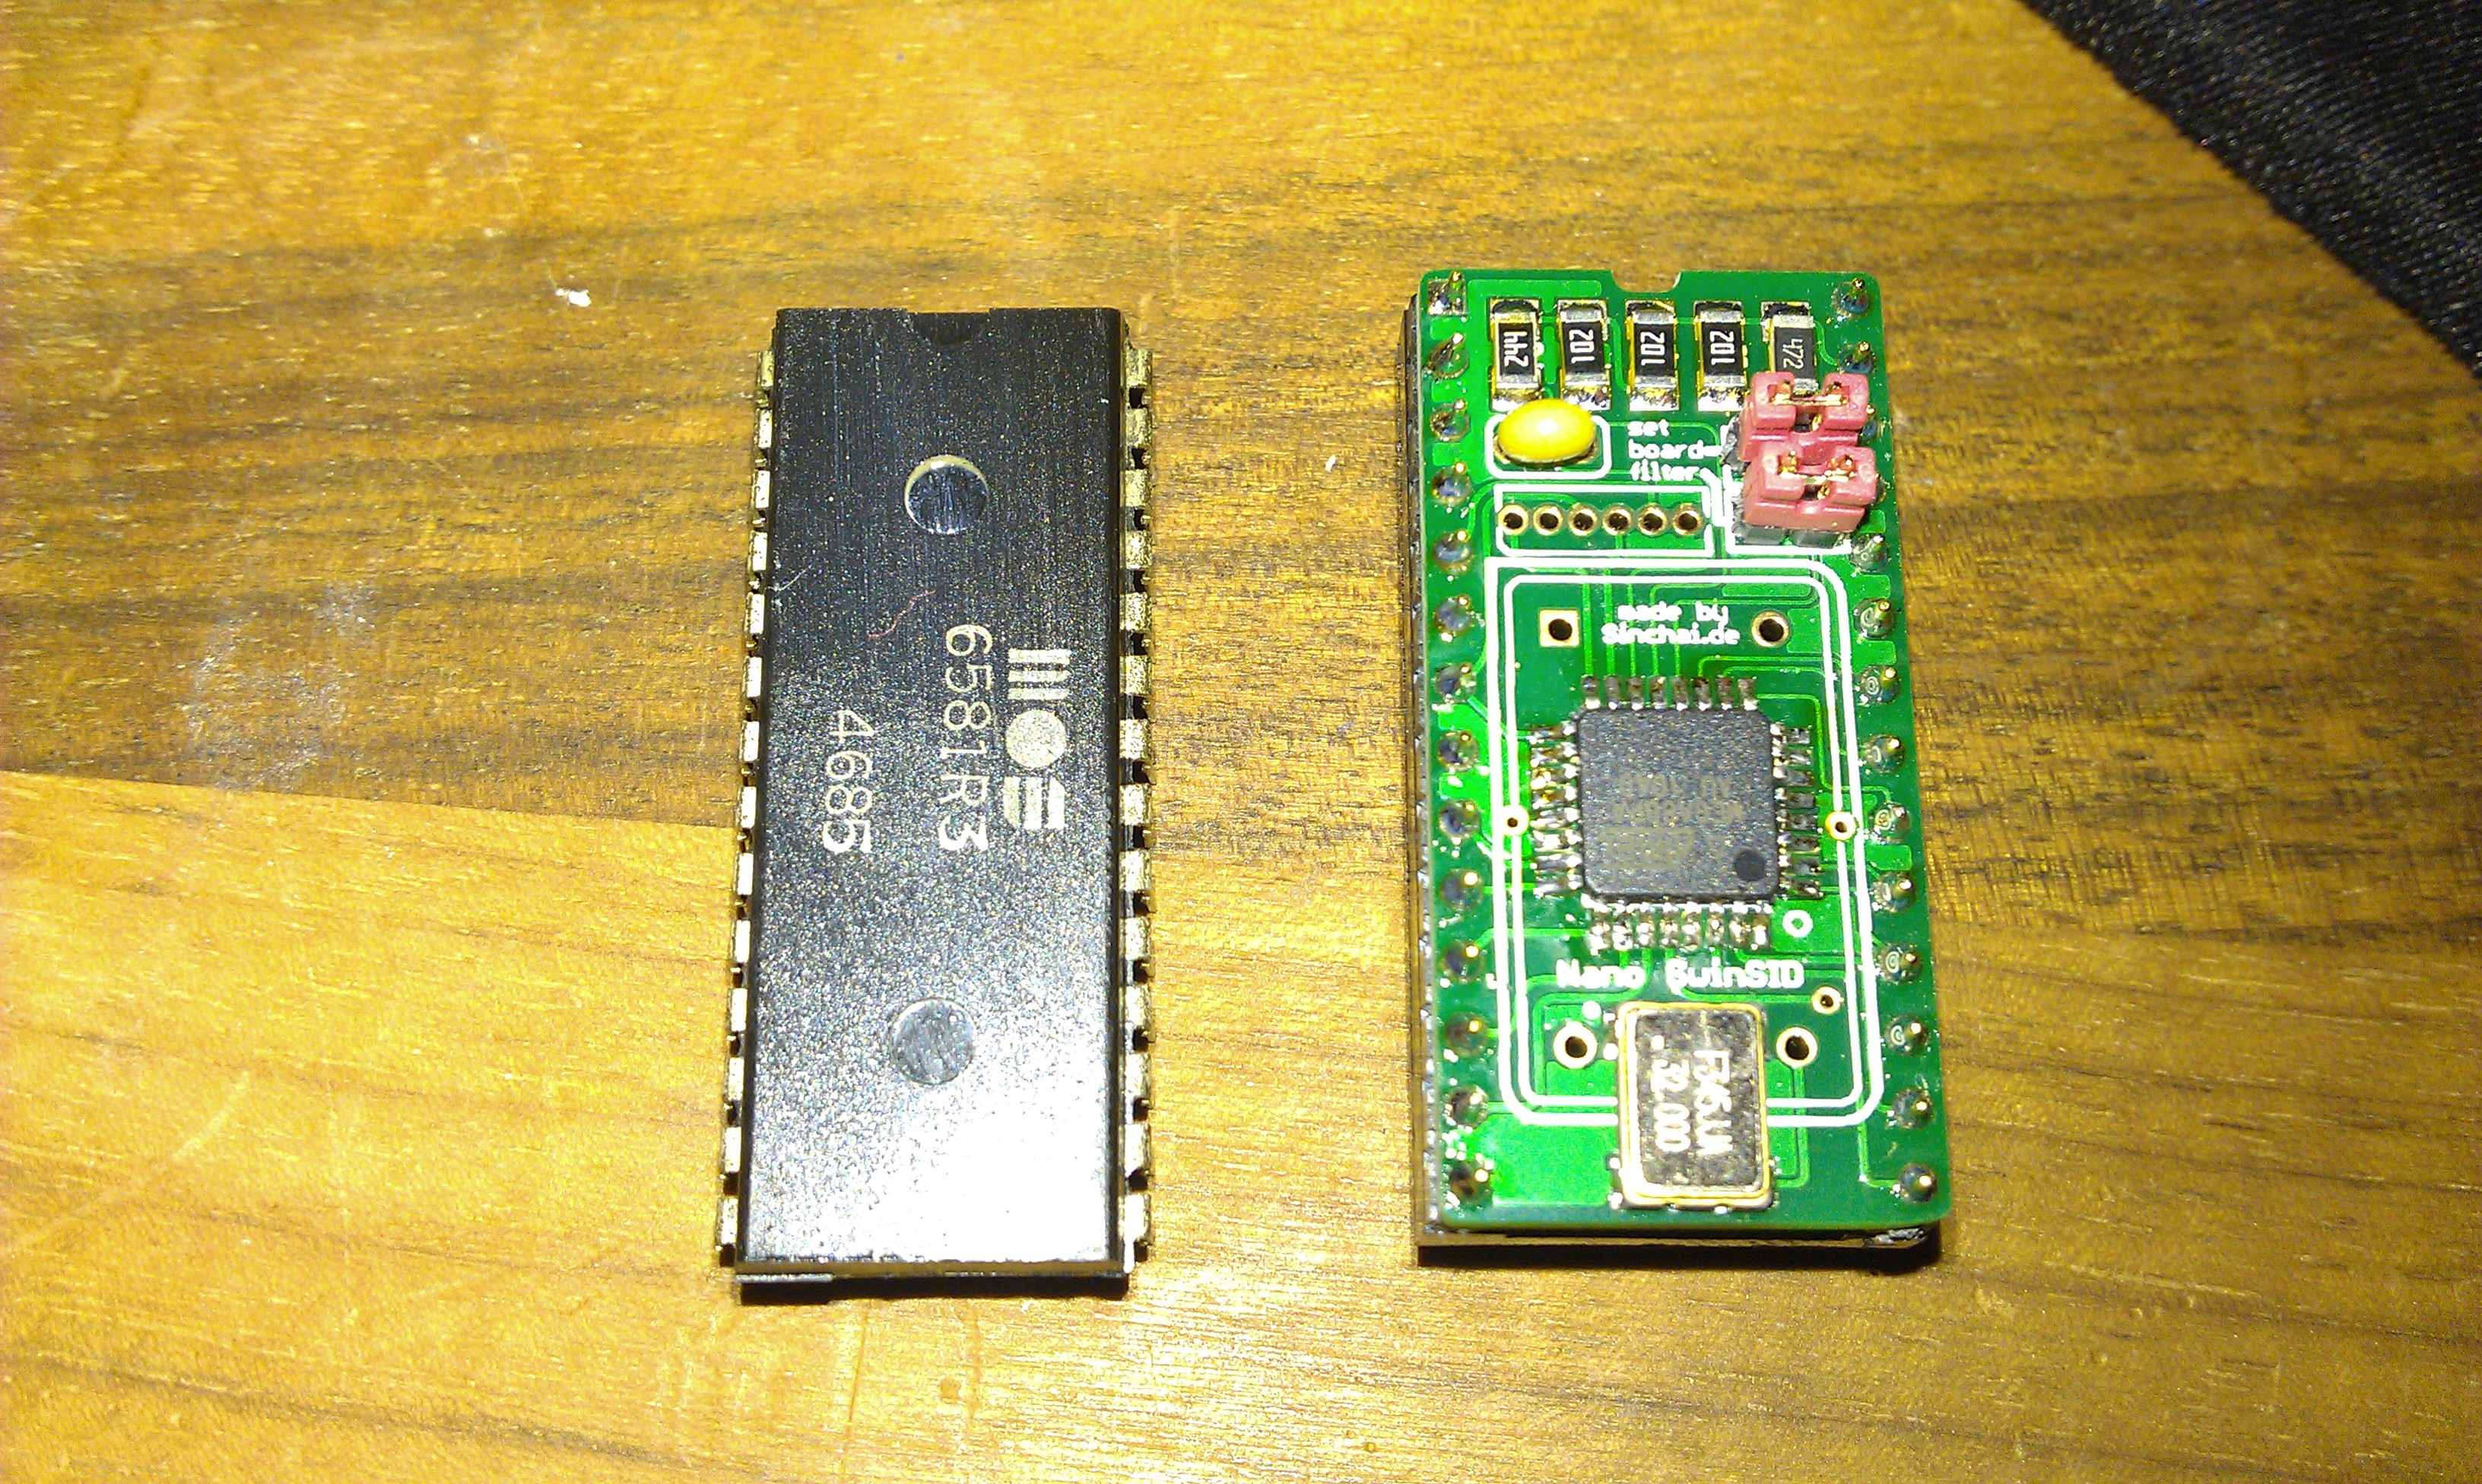
I first saw them around April this year but have not been available to buy until now.
As you can see they are around the same size as the original and my first impressions are very good.
There are 2 jumpers on these.
The top one needs to be removed for older C64’s. It has something to do with resistor R3 and bring the volume level up.
The lower one is to switch between 6581 and 8580 emulation. A switch could also be added here to switch between then on-the-fly.
To test these against an original 6581 I used the SIDPlay program running from SD2IEC and fed both the samples into a PC to record them.
The most noticeable difference for me is the volume level on the original is far higher and I also think its a better, cleaner sound BUT as the SID chips are now going for stupid money by opportunists on eBay then this is a really nice alternative and one that will come in very handy in the future for many people.
Here are the .WAV files. Ive not converted these in any way, they were taken using Sound Recorder app that comes with Windows XP. The samples were taken directly after each other and no settings were altered at all.
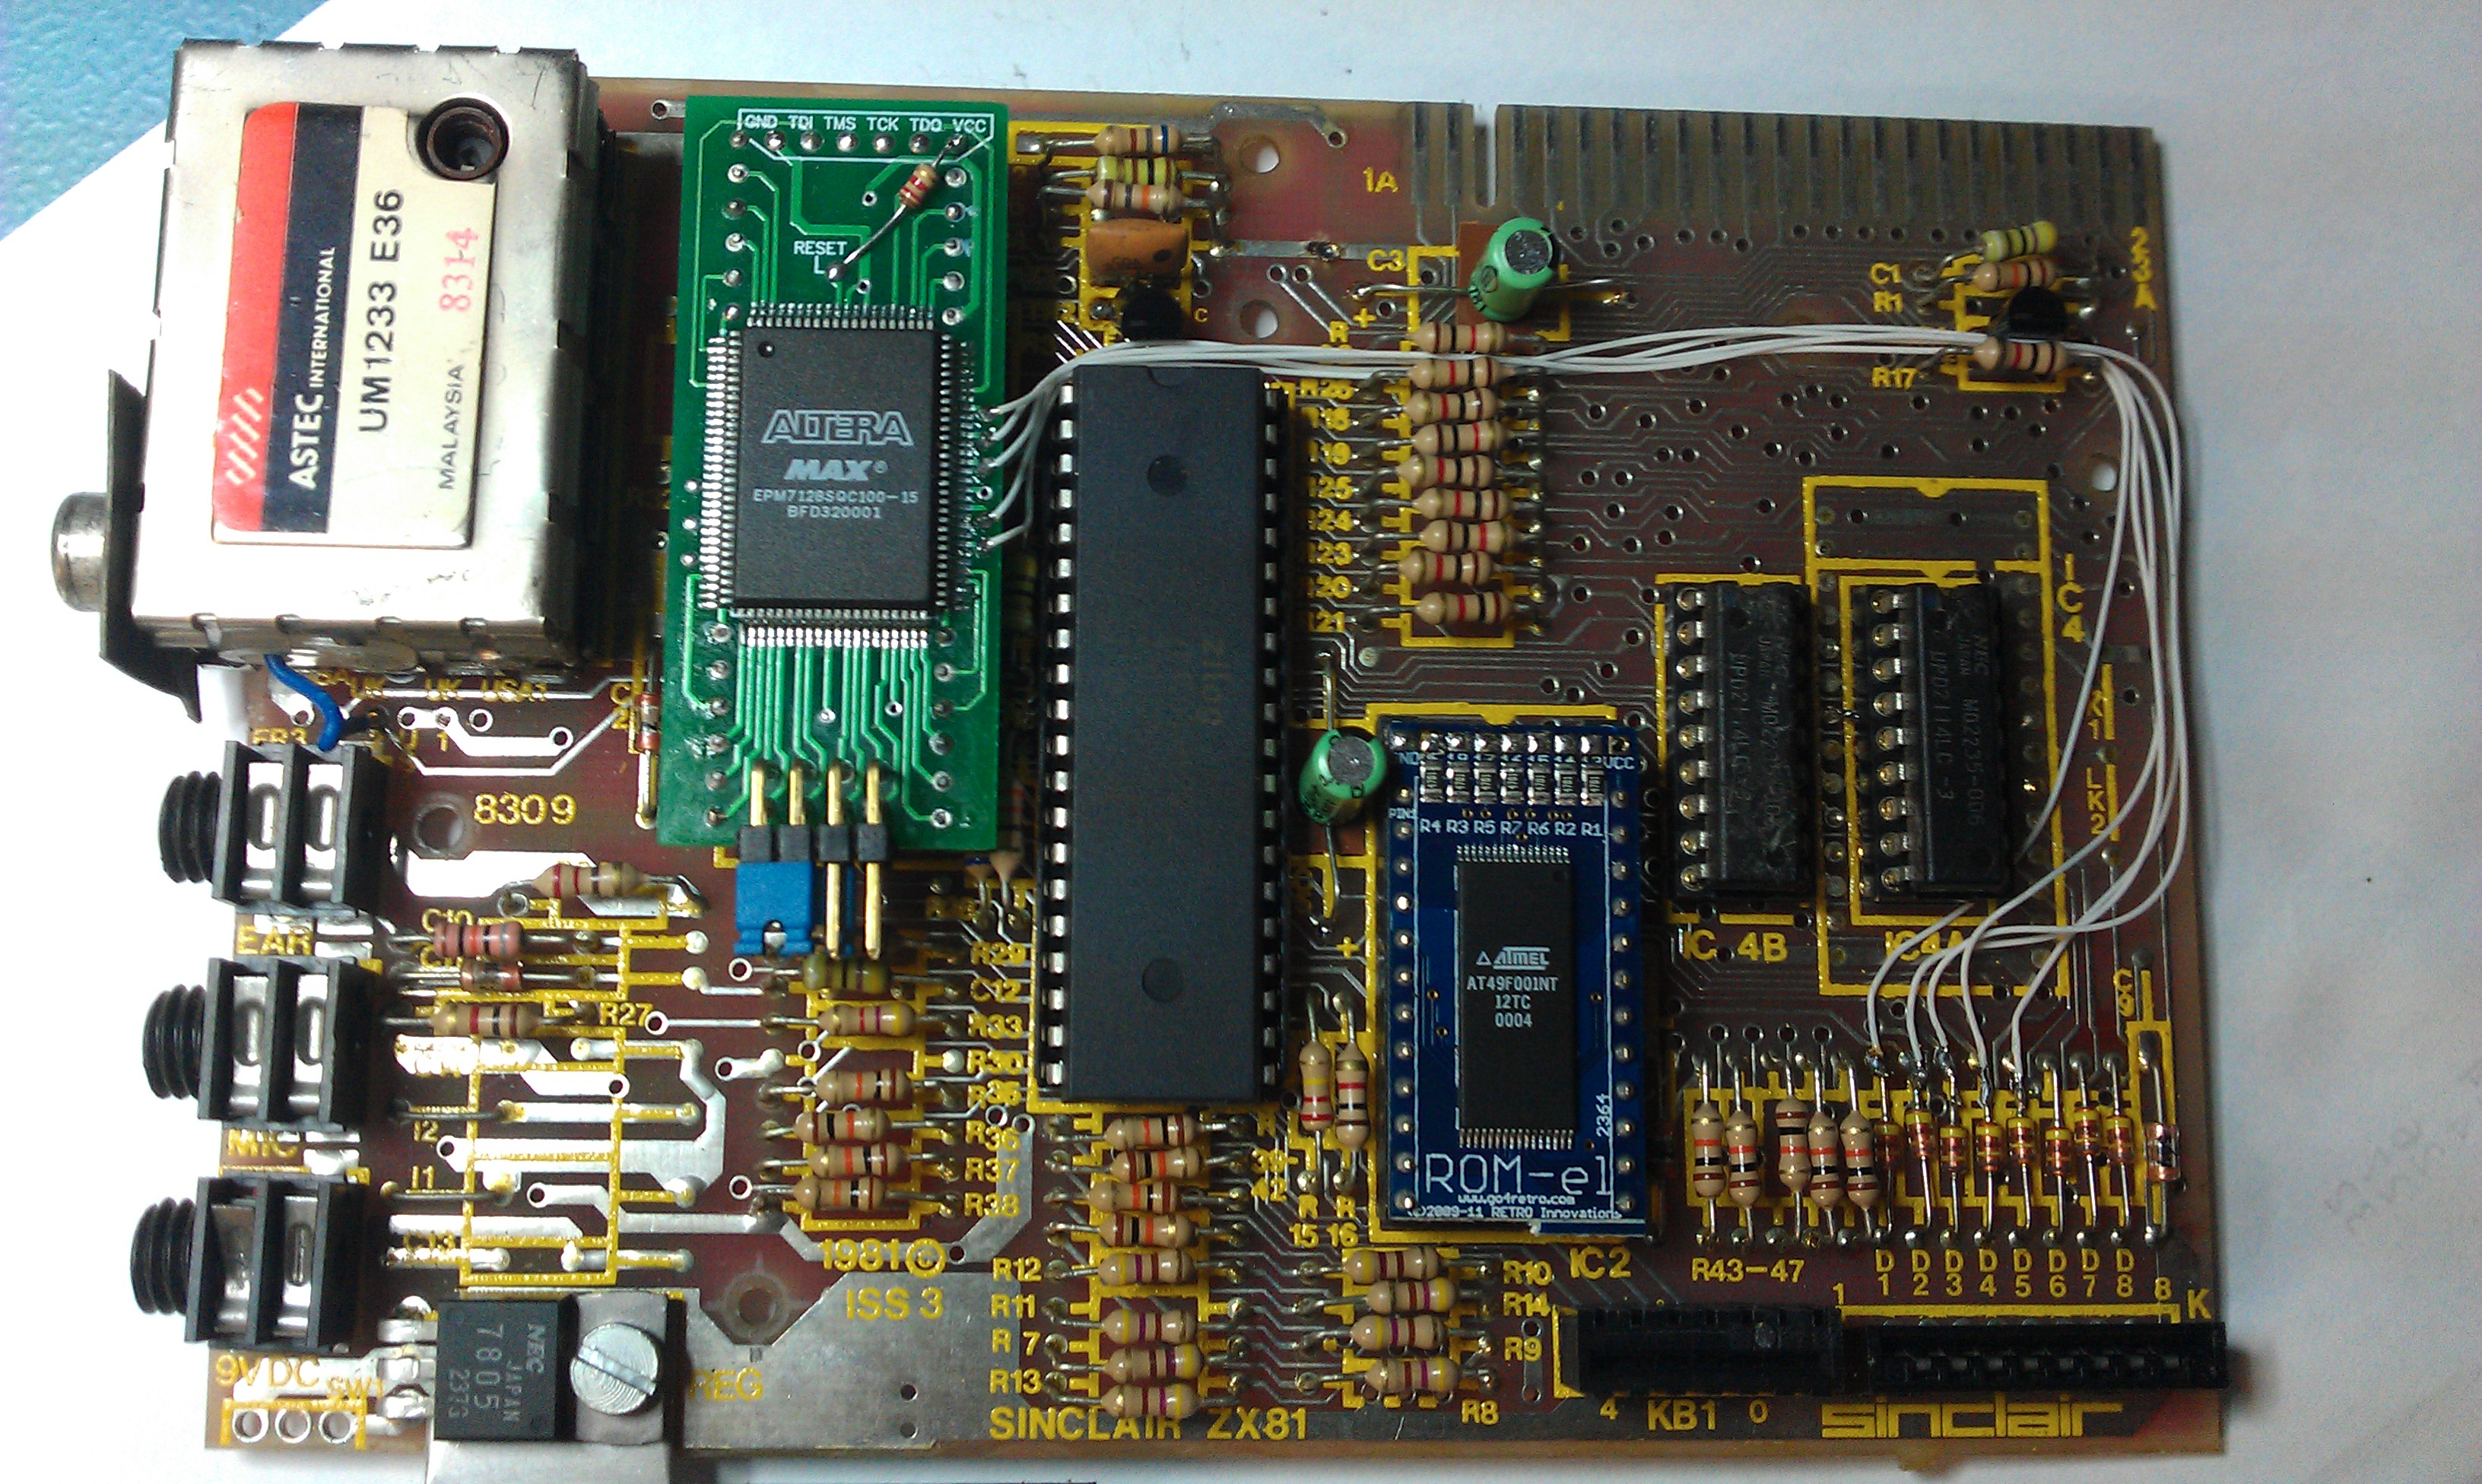
So my ZX81 ROM is apparently too slow to take advantage of my ULA so that means I needed an alternative. Unfortunately, as with the breadbin C64’s there is no EPROM alternative for the 2364 ROM but there is also no room in the ZX81 case for an adapter to fit properly.
Enter the ROM-EL 2364 from Retro Innovations.
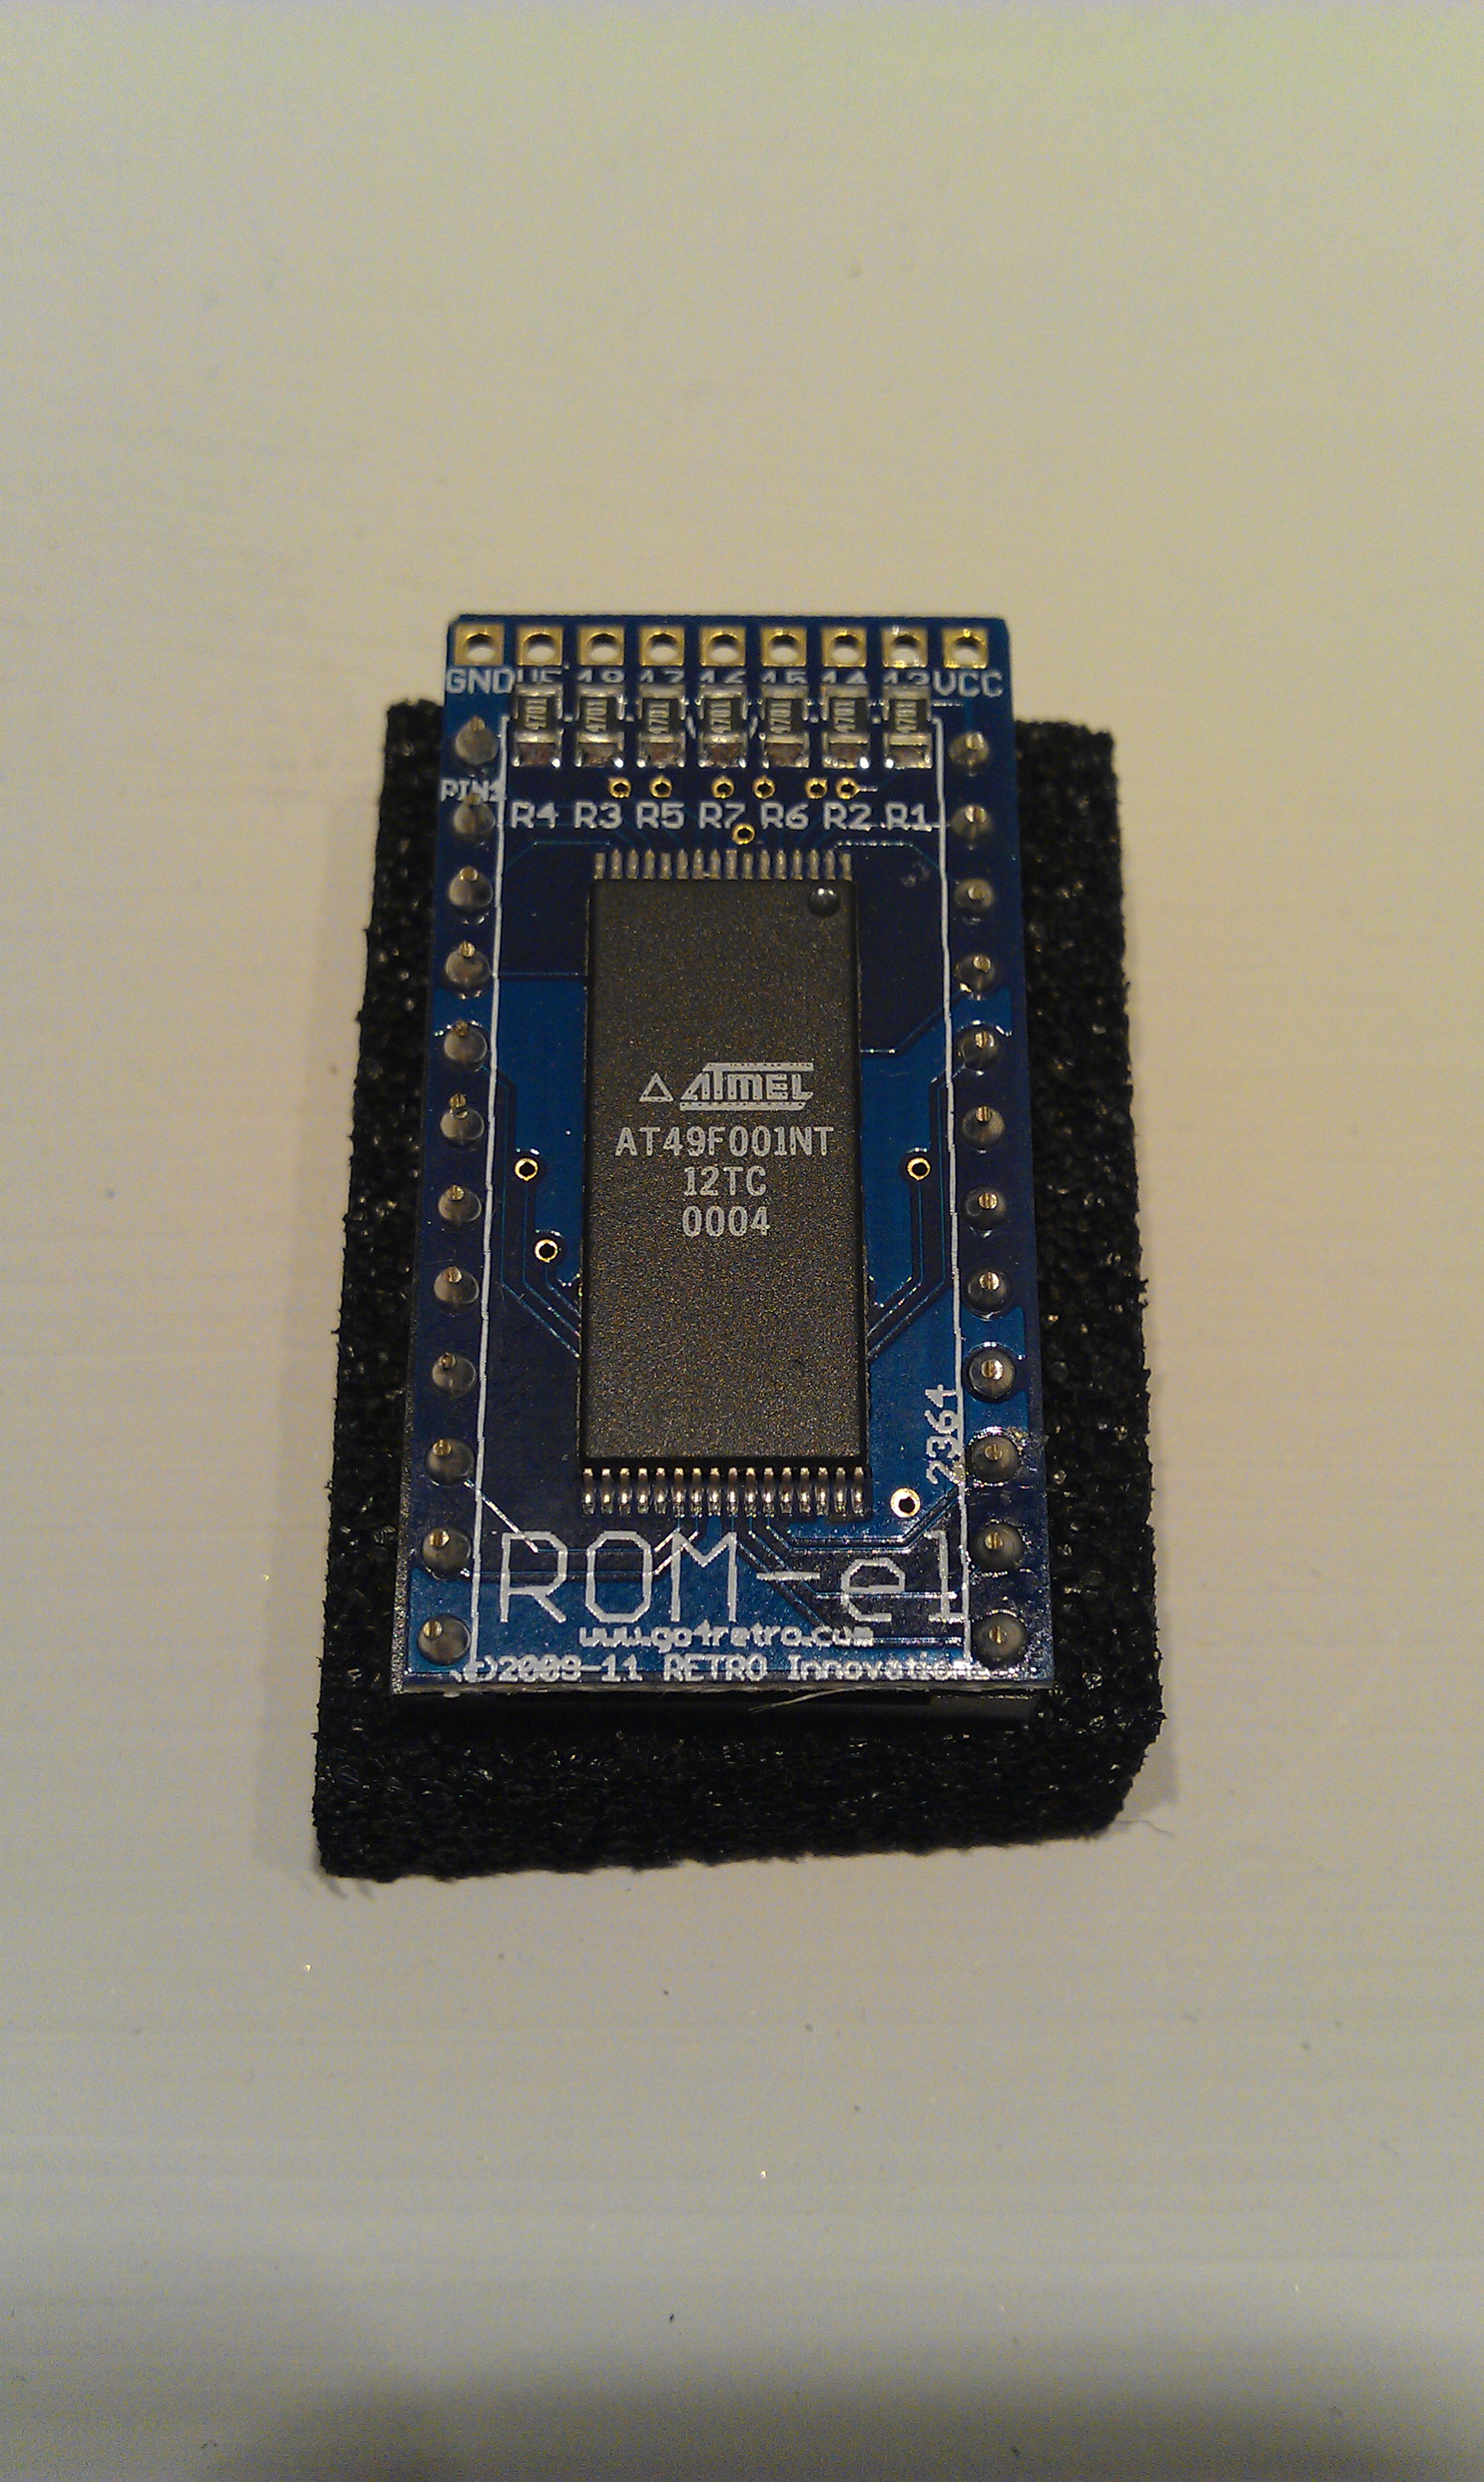
This is a modern day solution for those old ROM’s and can be made switchable with a little extra work.
The only problem is an adapter is required in order to actually program the replacement. As the one I made was a complete hash I wont be taking any pictures of it but it served its purpose and now I have a switchable ZX81 BIOS.
My 81 is starting to look less like the original and more like a modern rehash but its working just great.
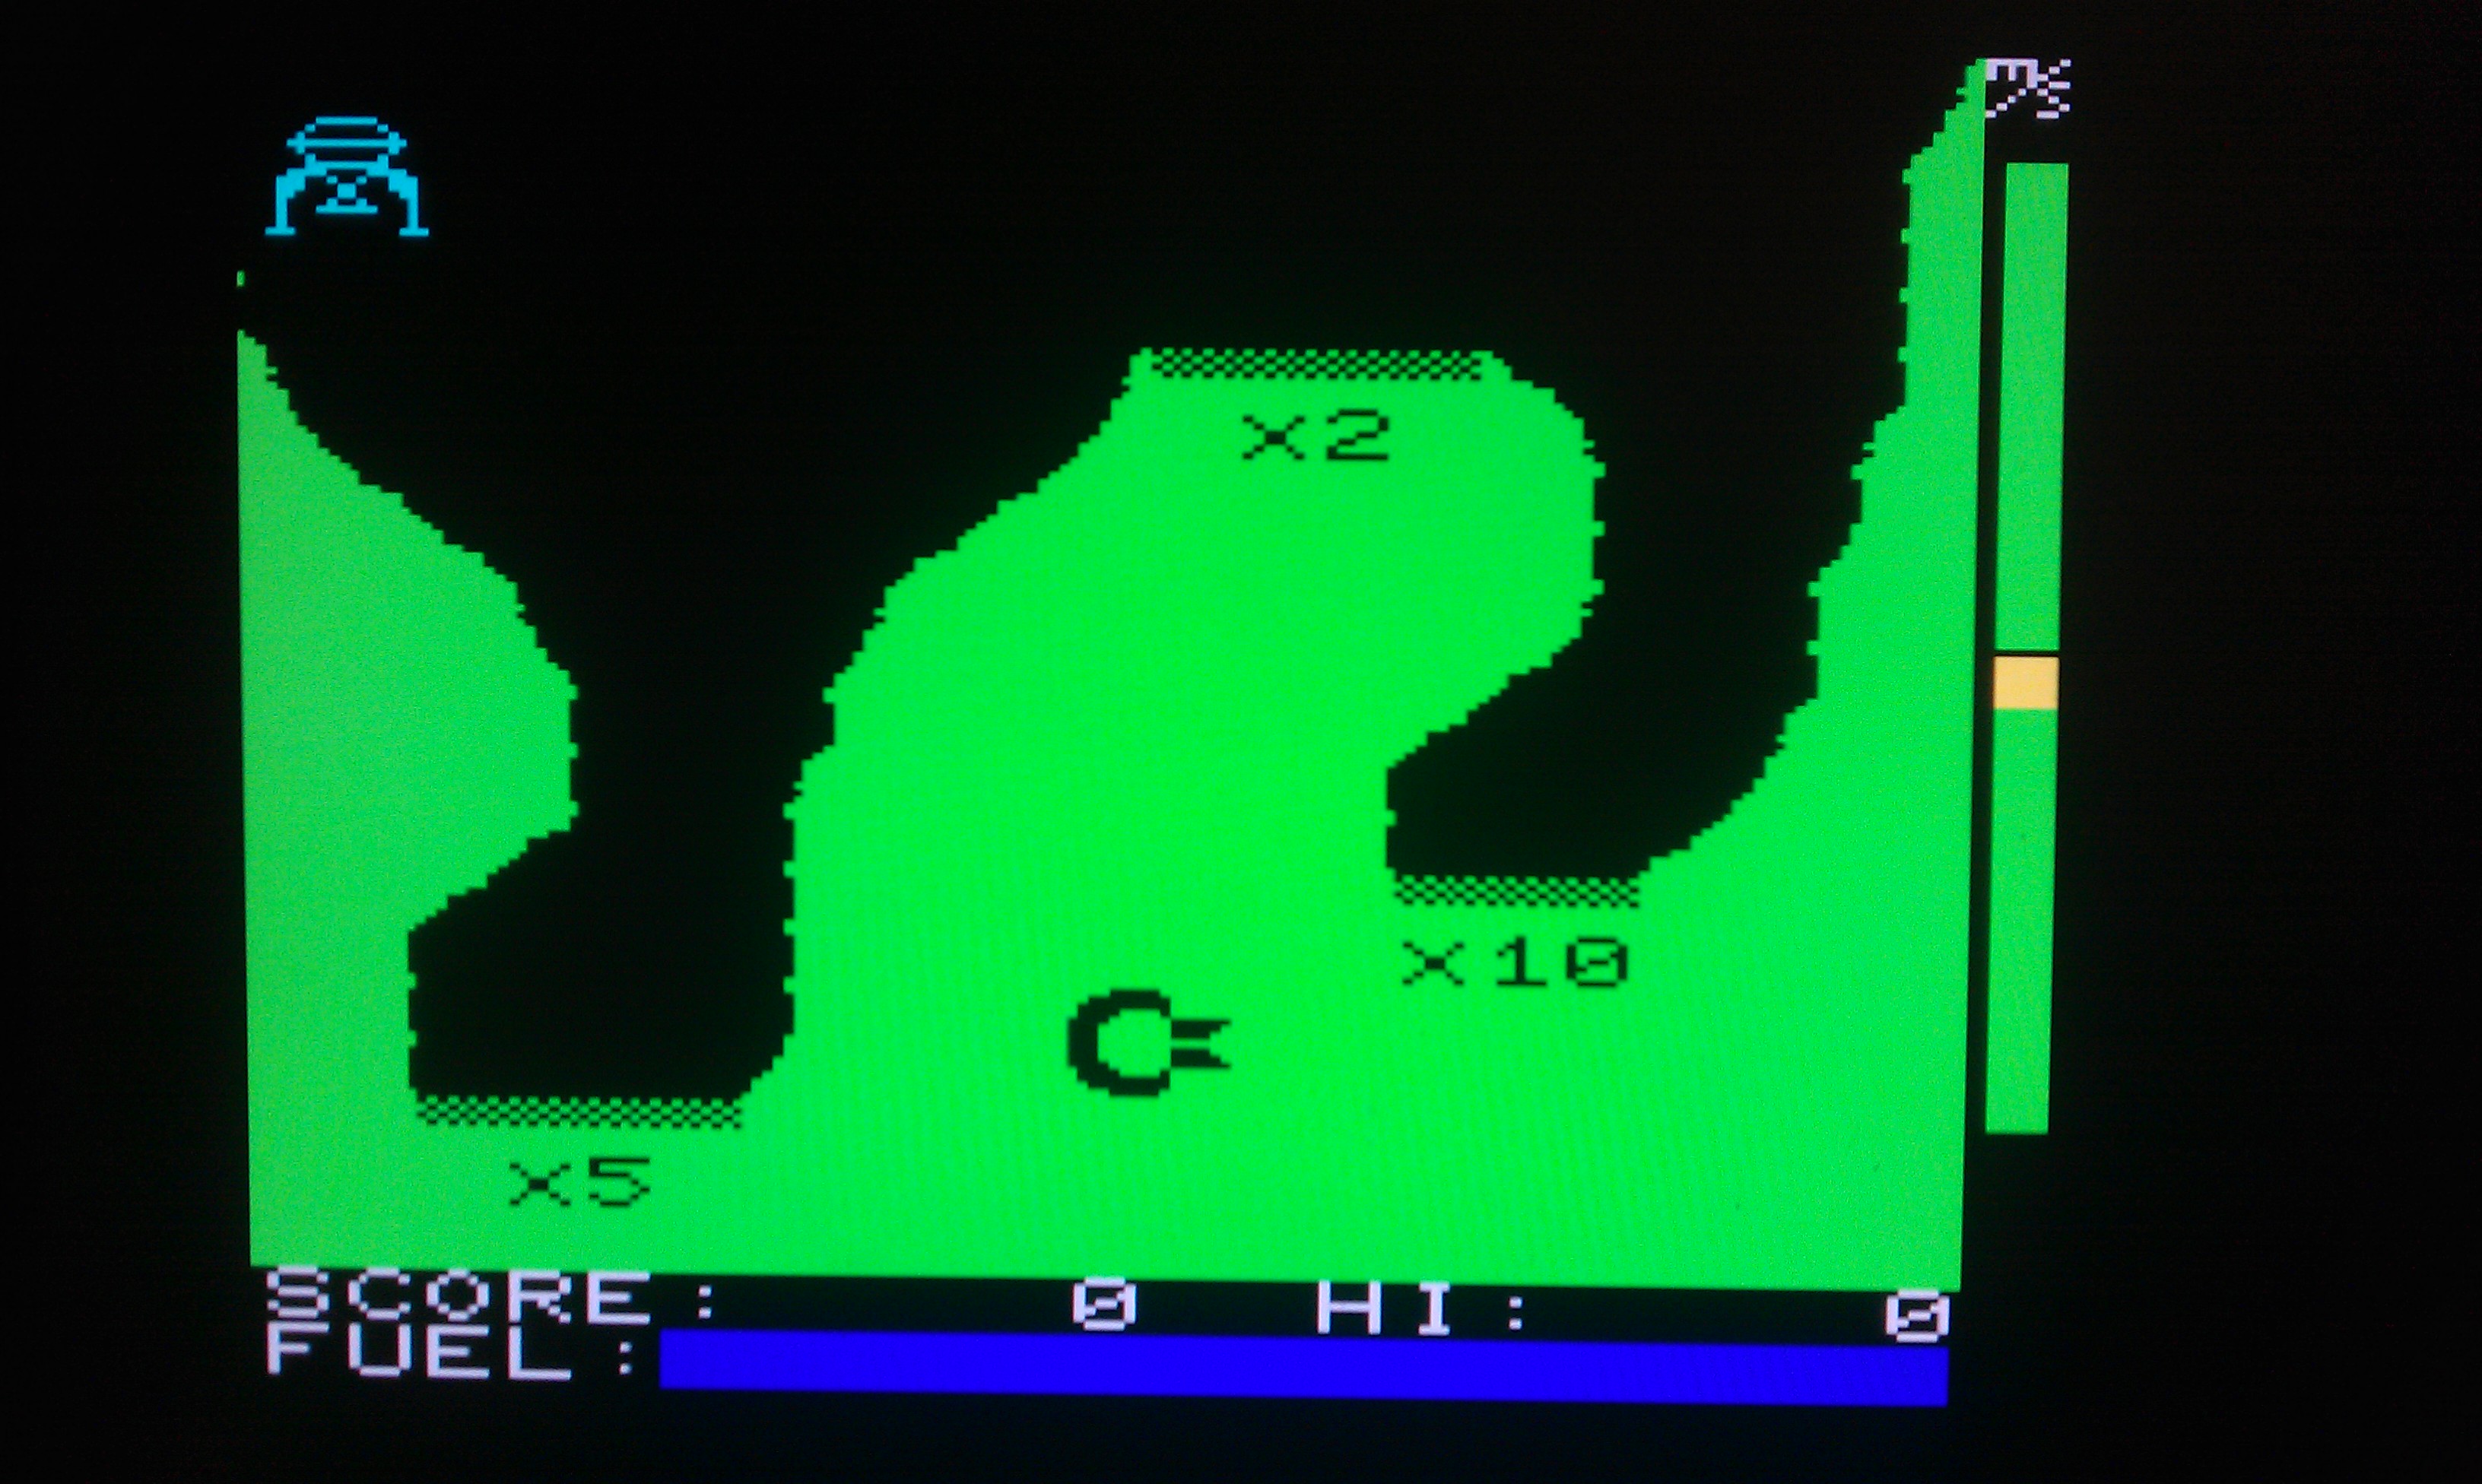
For some time now I’ve been watching the fpgaarcade website and have even bought some of Mike’s replacement C64 PLA chips.
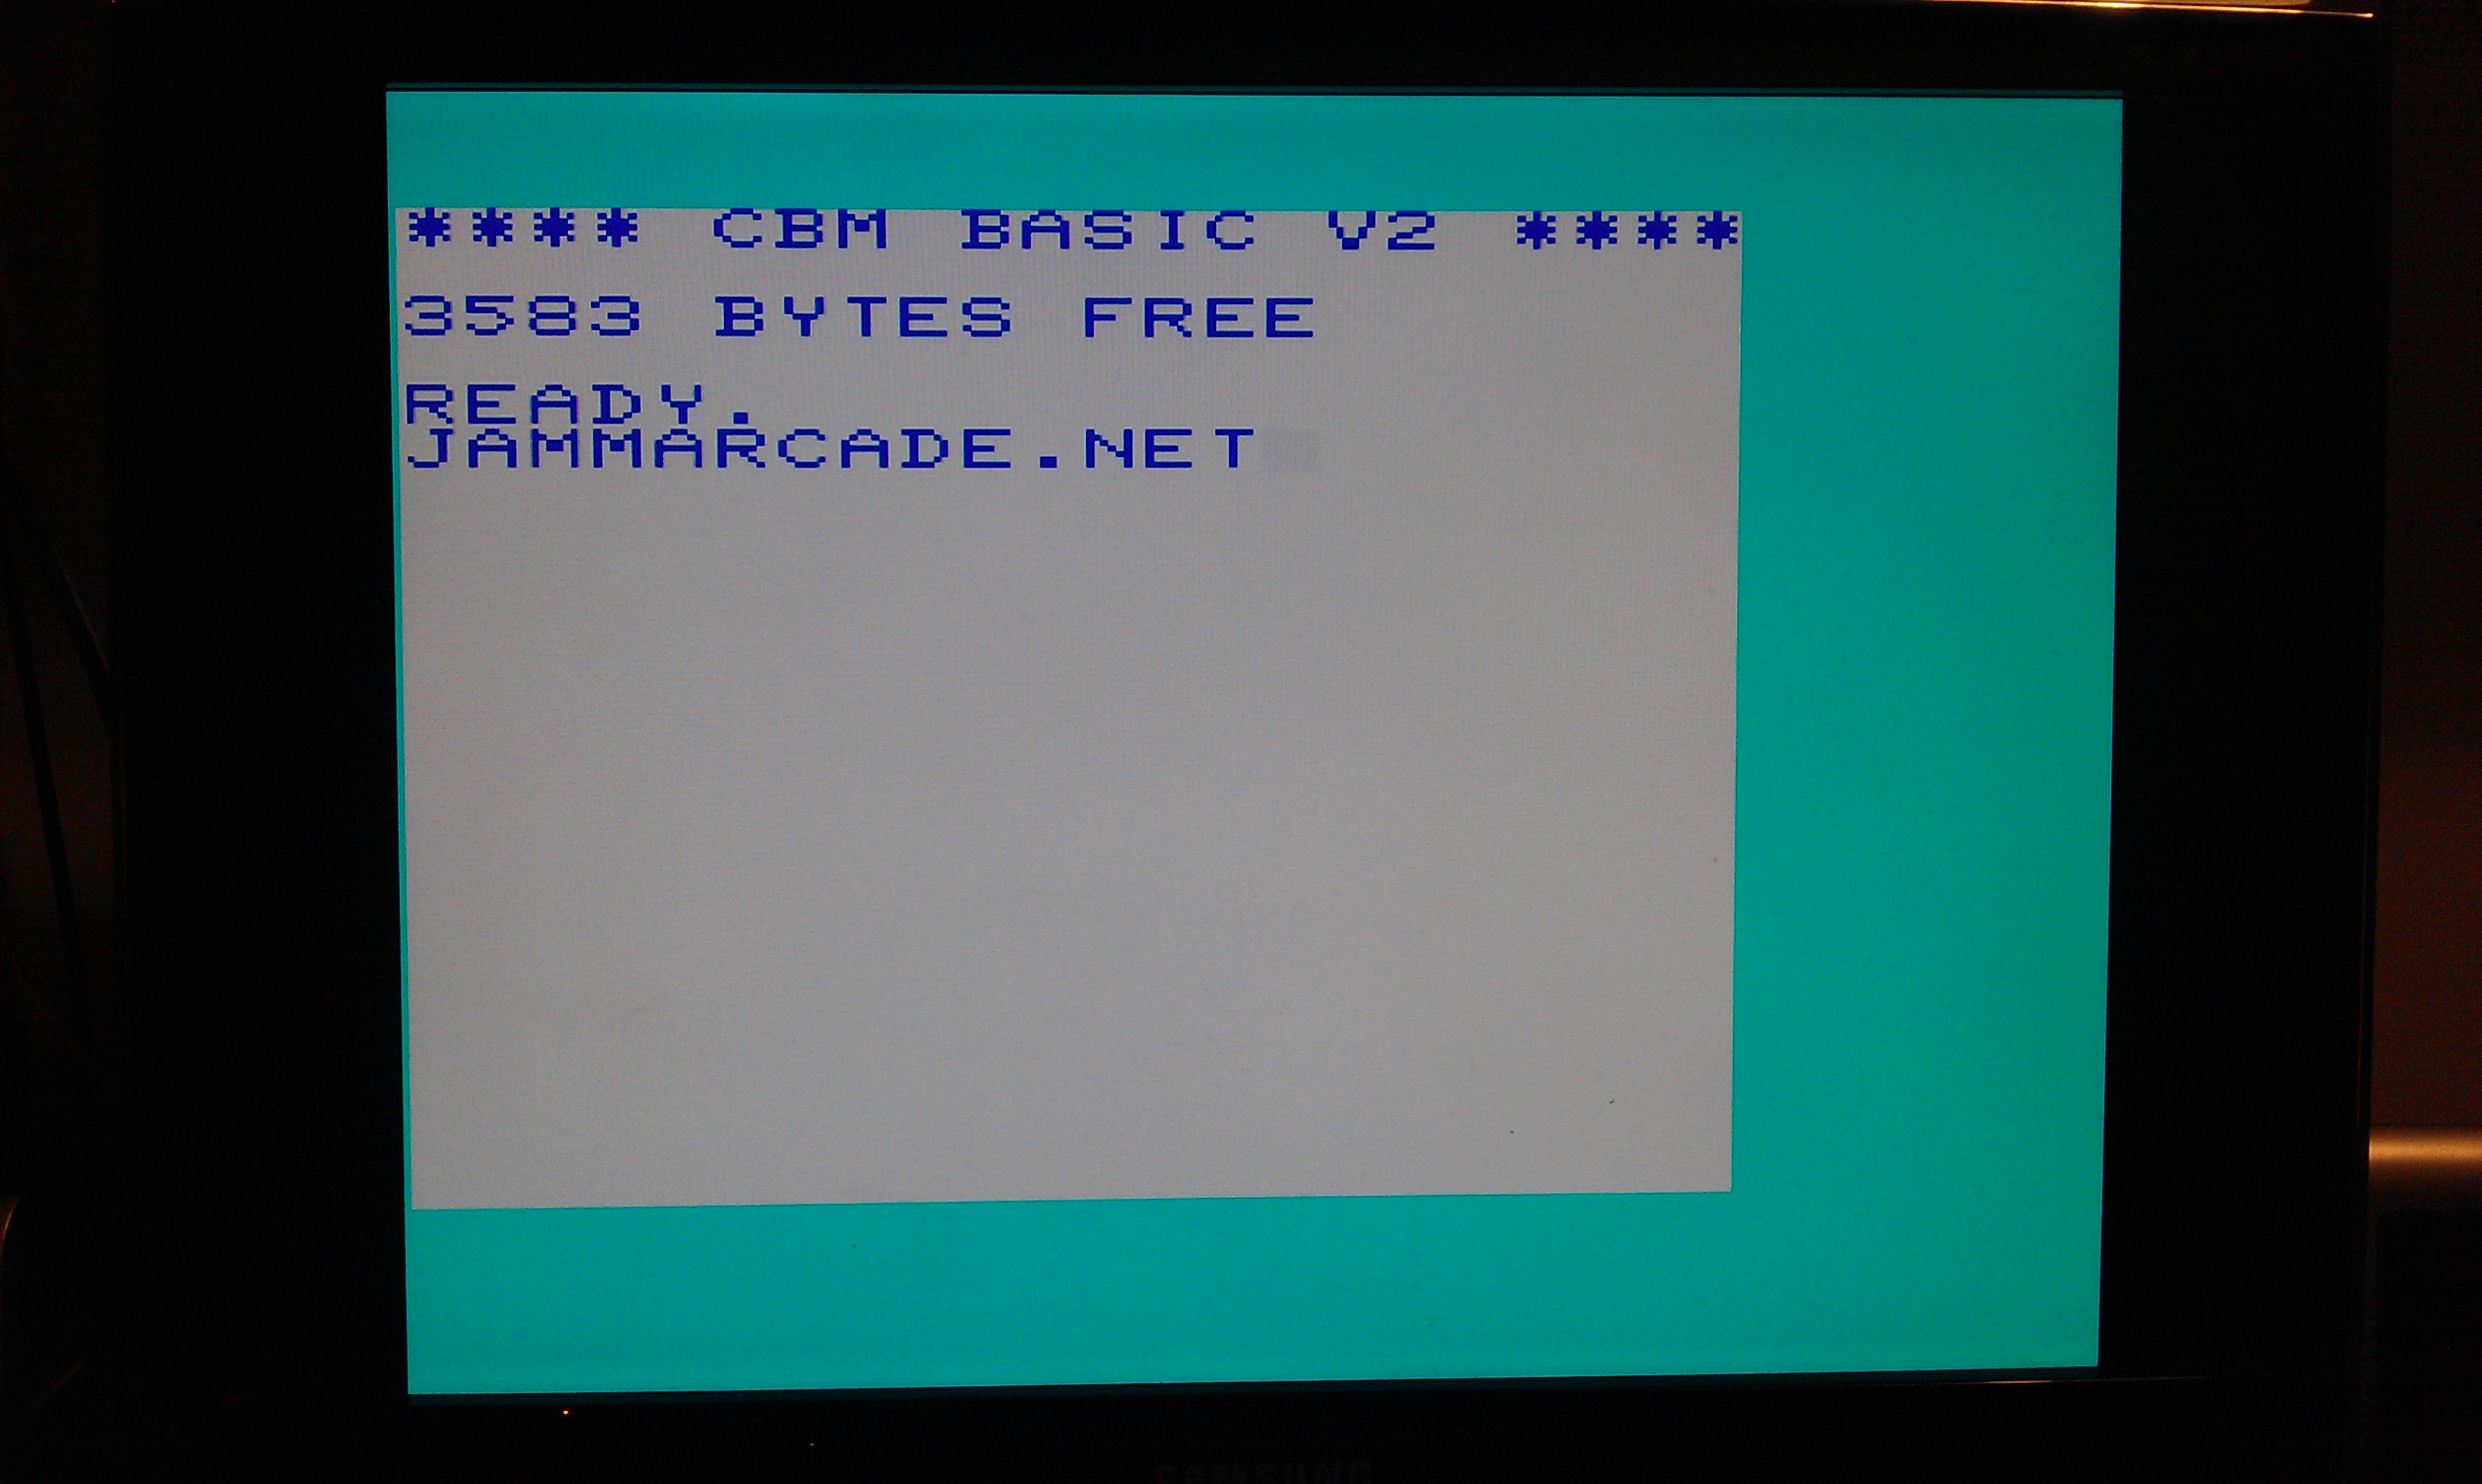
Recently I got my hands on a Spartan 3E FPGA development board and thought id try out Mike’s FPGA implementation of the VIC20.
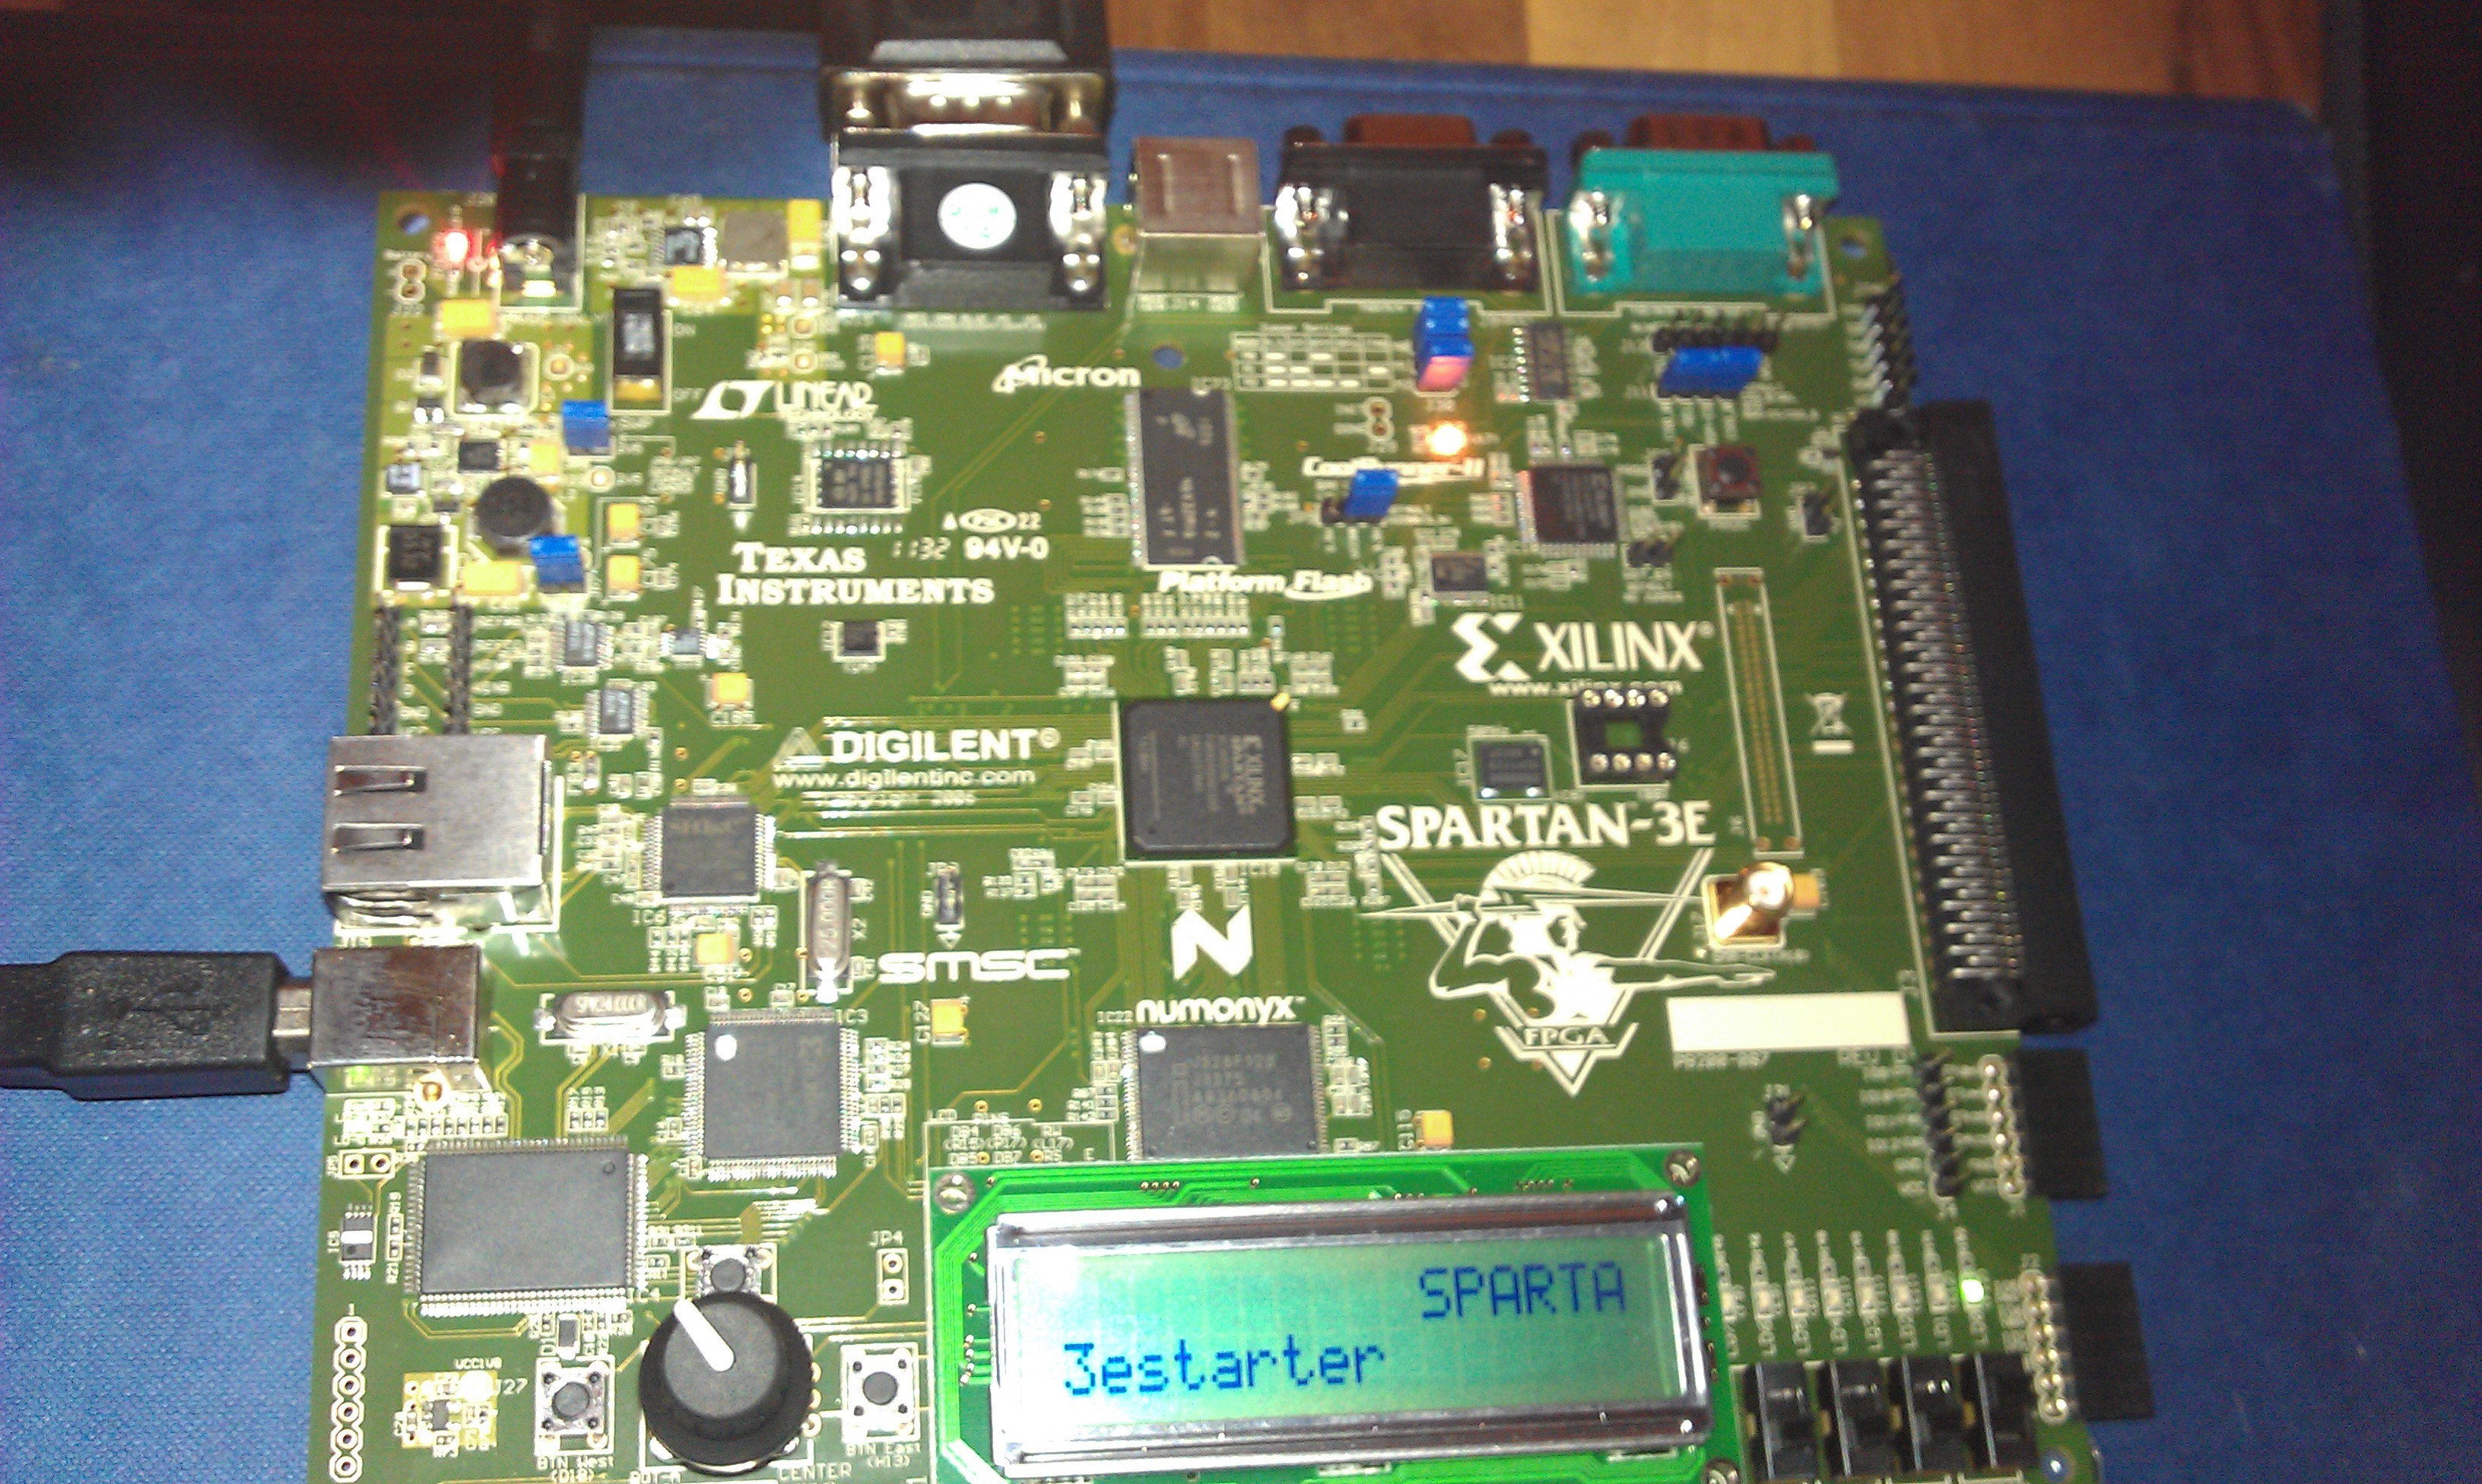
Following the instructions provided it was a breeze compiling and transferring the VHDL.
Plugging in the VGA cable and setting the on board switches to 31khz I was greeted with
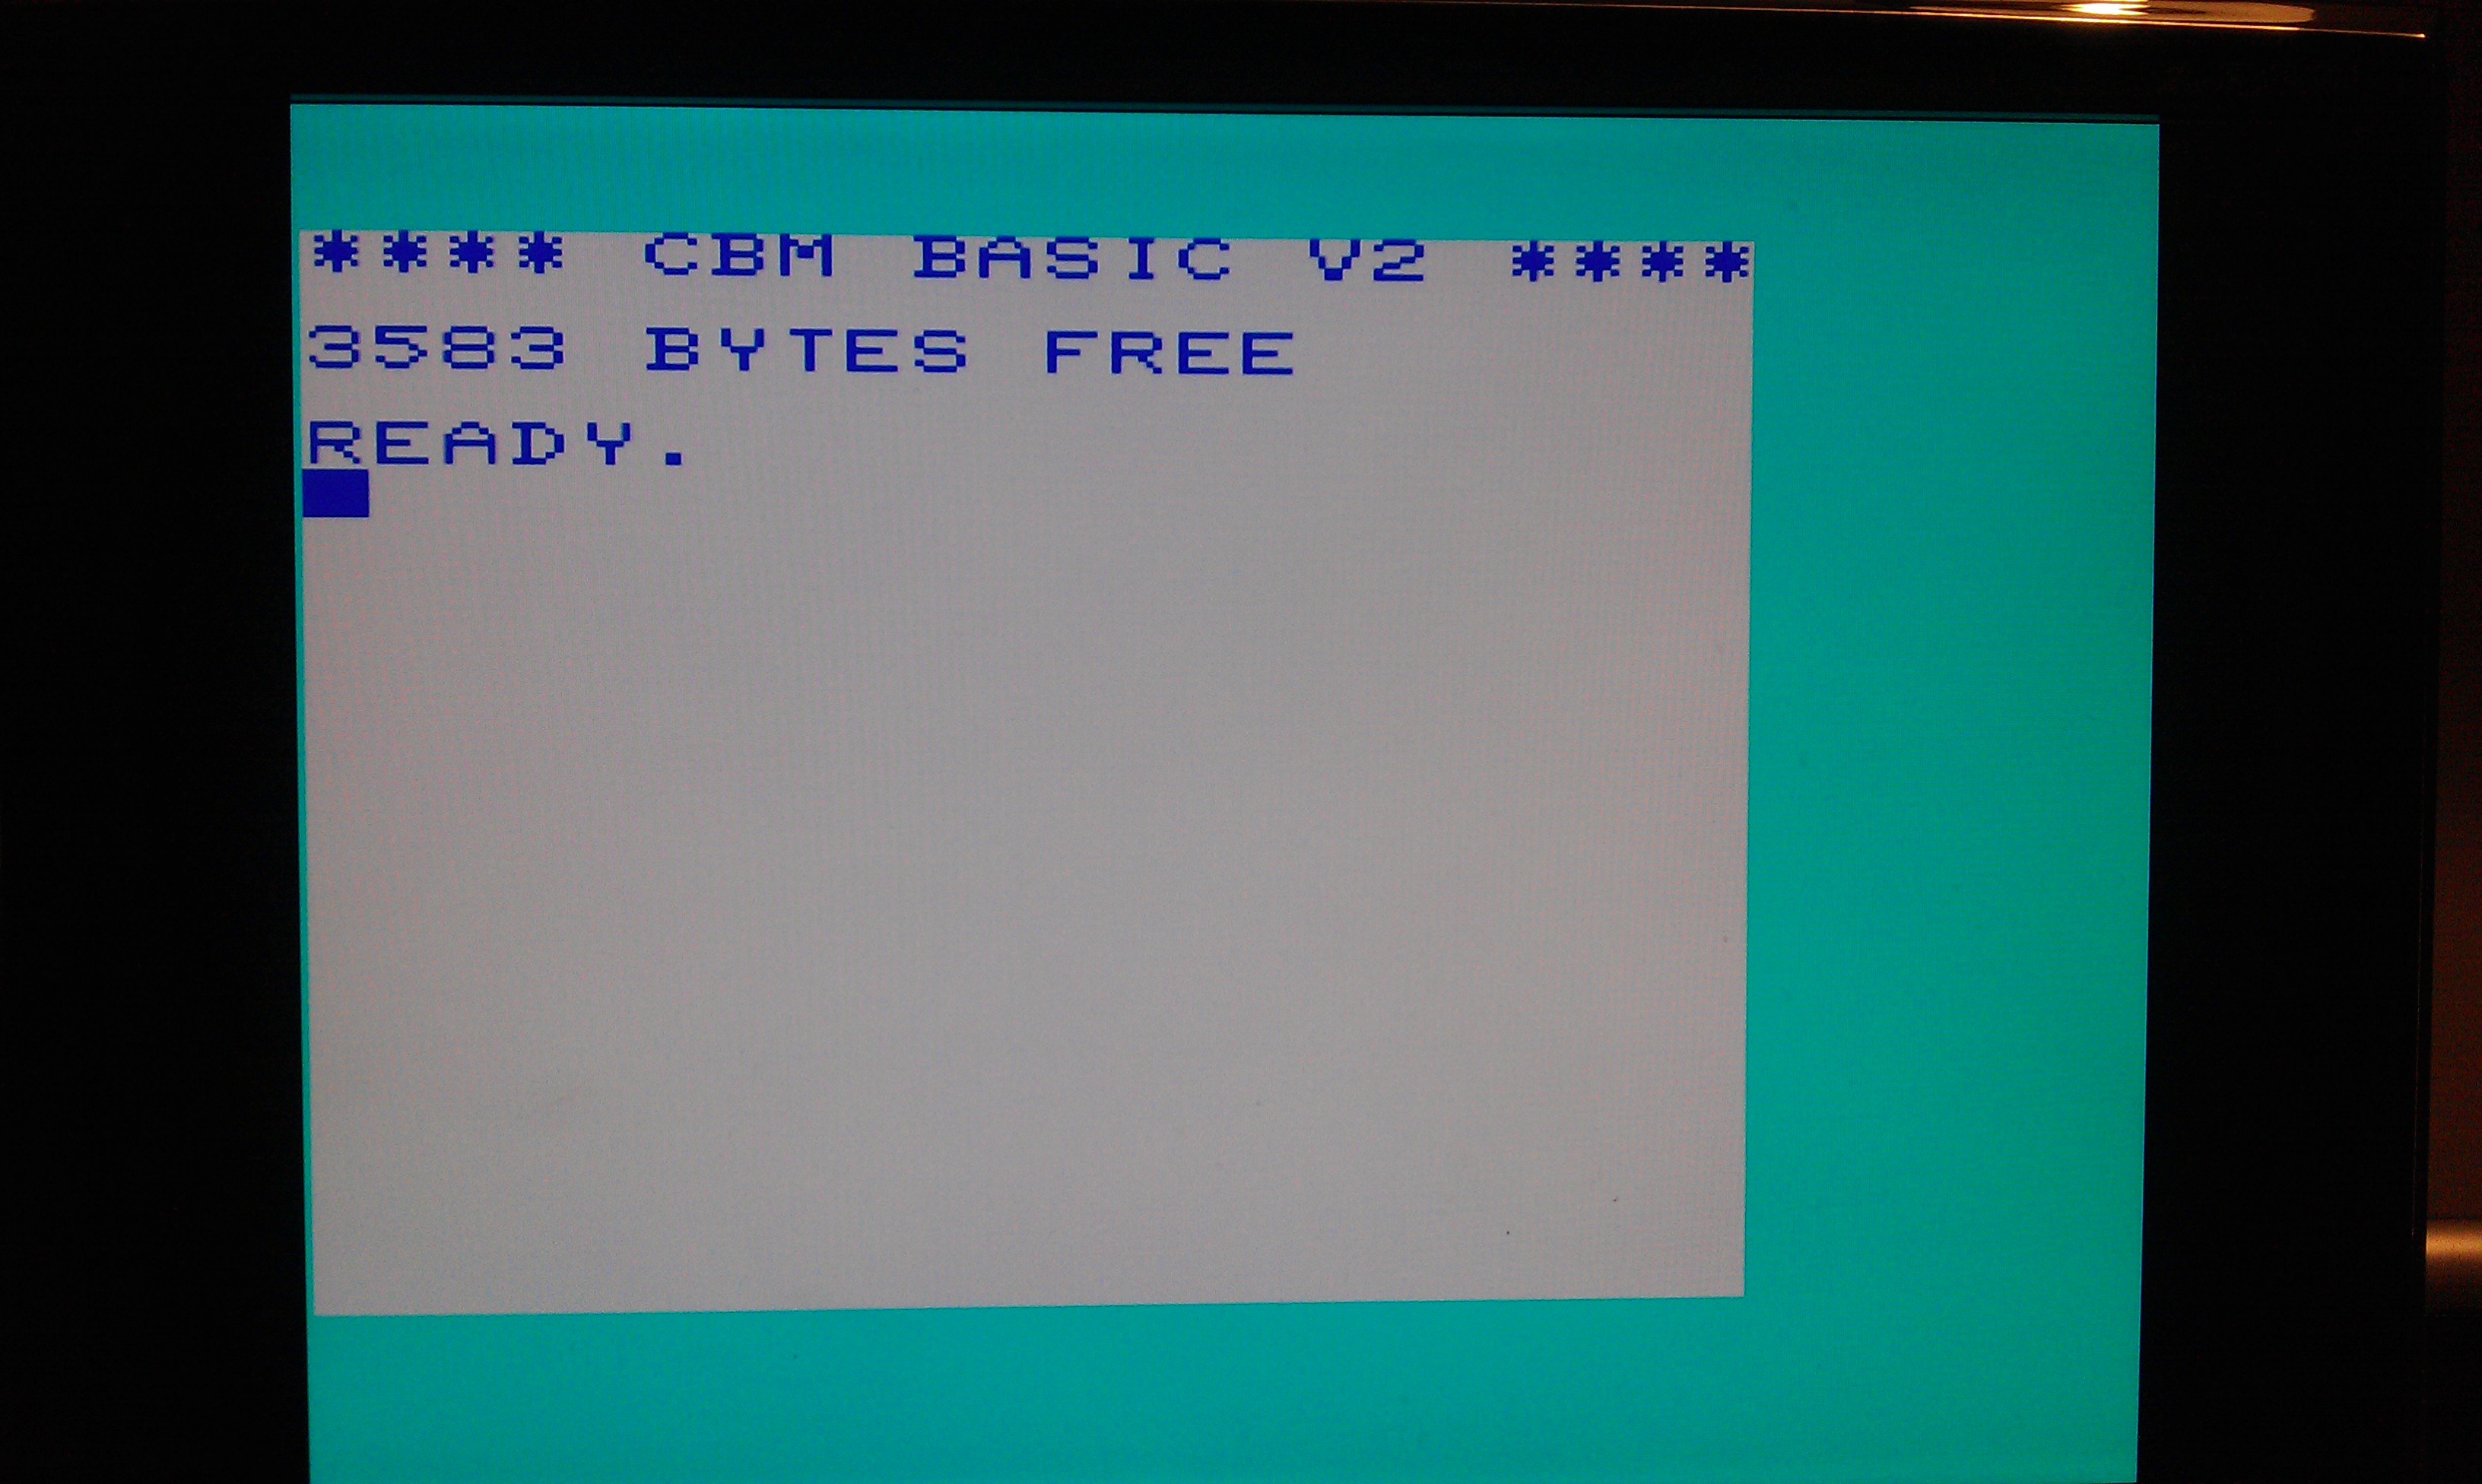
On my monitor here the screen is offset slightly but im told another monitor may yield better results.
The Spartan development board also has a PS/2 port which when I plugged in a keyboard was able to use the VIC20 as I would a real one.
This thing is so good that I can even upload 4 converted cartridges into the on board flash memory and run them at the flick of a switch. Once I get my serial cable built ill try that out too.
Now, on with learning VHDL, its not going well.
All credit goes to Mike at FPGA ARCADE
EDIT: Got a serial cable made up and flashed over the Jupiter Lander game as described with the VIC20 VHDL source, works pretty well.