muddymusic dumped a D77-03 PAL from one of his Taito F3 cartridges today.
At this moment it is untested so if you test it please let us know.
Thanks to muddymusic

muddymusic dumped a D77-03 PAL from one of his Taito F3 cartridges today.
At this moment it is untested so if you test it please let us know.
Thanks to muddymusic
Found this Konami Lightning Fighters PCB buried somewhere in the pile so today I decided to take a look at.
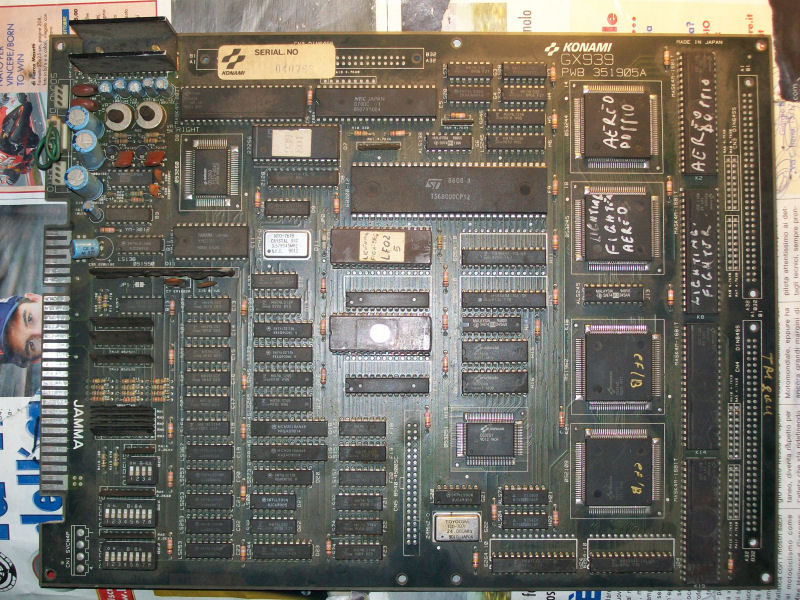
I know quite well this kind of hardware since I repaired two of them in the past and I can say it’s not really complicated, the use of graphical ASICs simplify a lot the PCB layout and troubleshooting.
Once powered on I got a solid black screen.Probing the main 68000 CPU revealed that watchdog was active and board was resetting endless.Dumped the two program ROMs gave me bad dump of the one @E15.Once reprogrammed a 27C010 EPROM, board succesfully booted but all colors were clearly wrong:
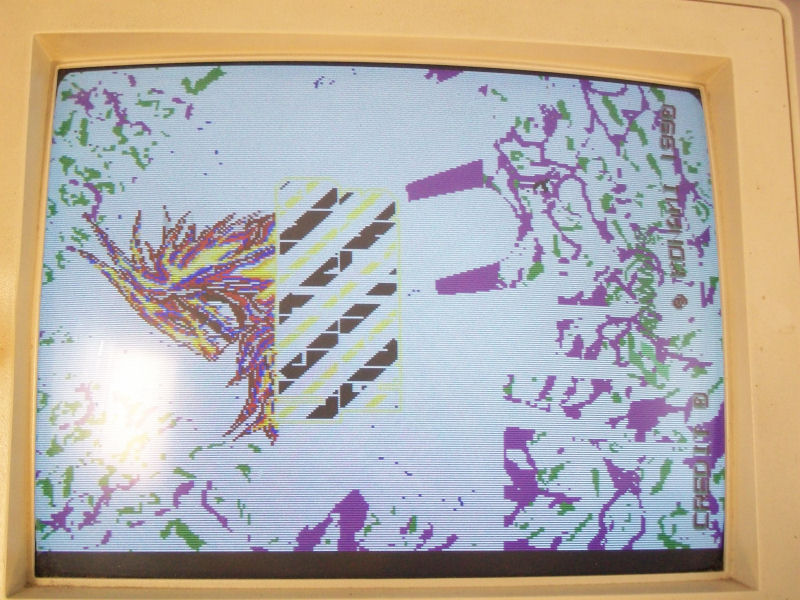
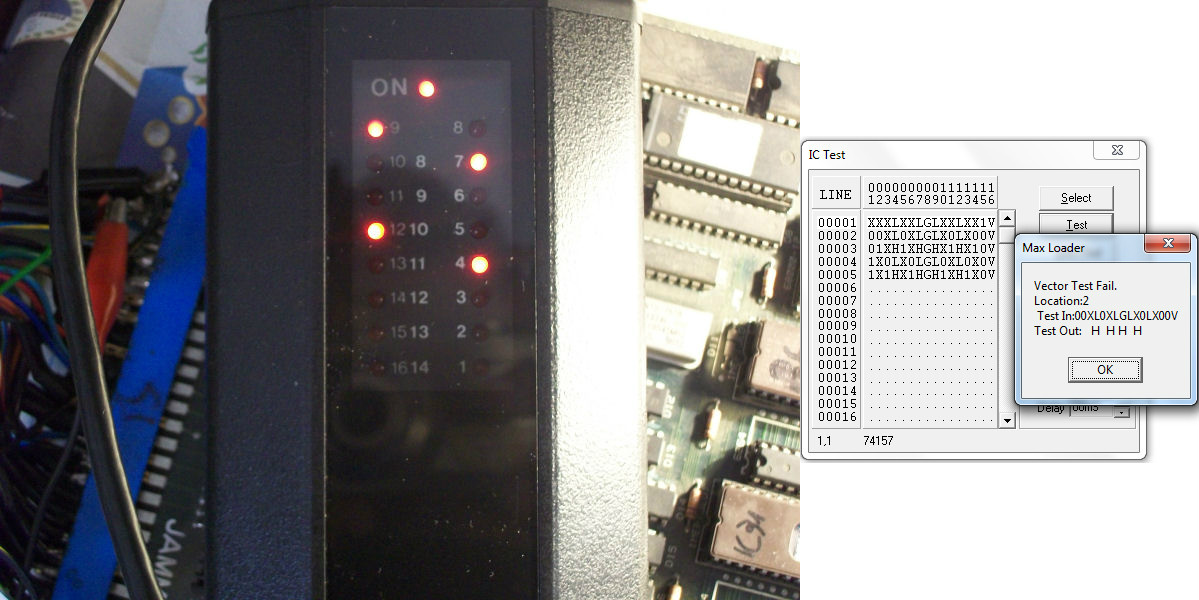
Schematics of this game were available so looking at them revealed that color RAMs were two 2018 @D18 and D19.Probing these two static RAMs I found some addressing lines not pulsing fine.All of these were tied to the four outputs of a 74LS157 @F19 (whose inputs were connected to address lines of 68000 CPU and ASIC marked ‘053251’ so this was how the two colors RAM were being addressed) .
Piggybacking a good 74LS157 restored all colors.Using my HP10529A logic comparator was a further proof of my suspects that were confirmed definitively testing this multiplexer out-of-circuit where it failed miserably:
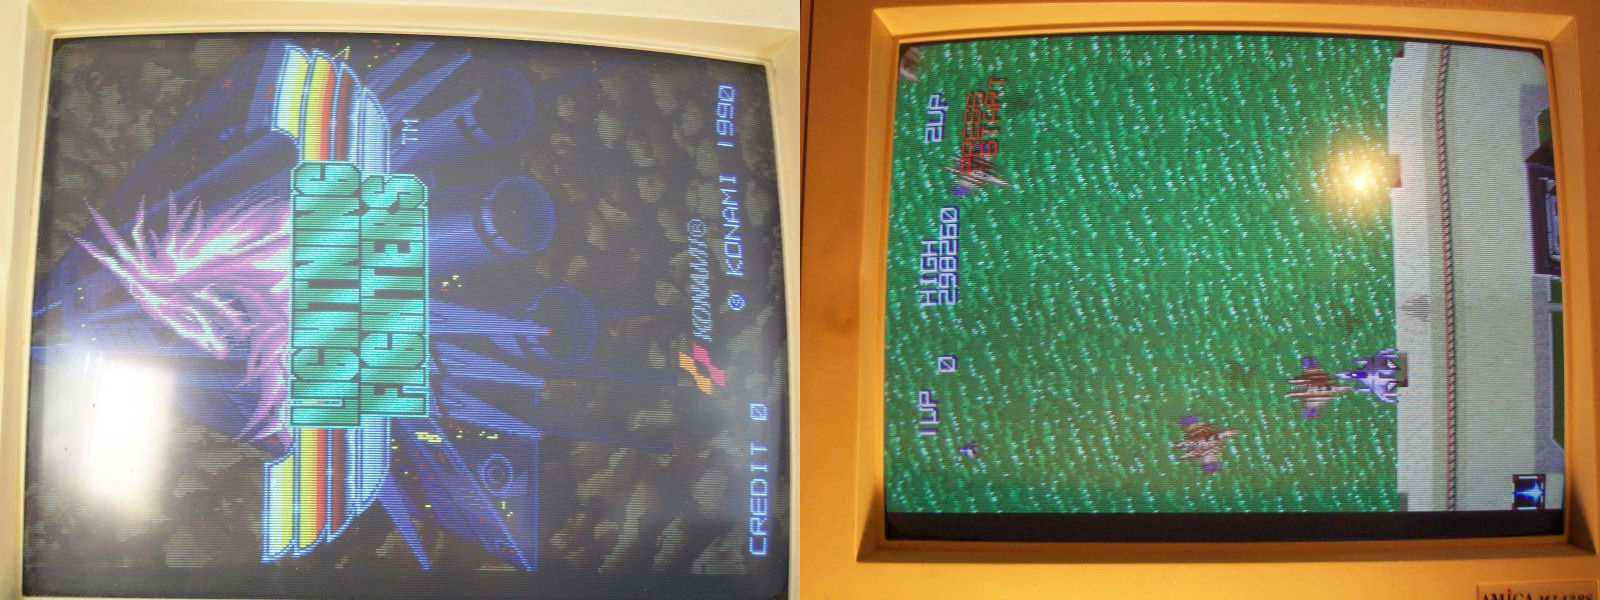
Fitted a good 74LS157 brought back the PCB to 100%.
P1pkin has released his NAOMI/NAOMI2 multi BIOS for everyone.
By changing the dipswitches you can change the region of your system
DSW2 DSW3
OFF OFF Japan
ON OFF USA
OFF ON Export
ON ON Korea
Original thread can be found here
Thanks very much to P1pkin for this.
Here is a sad fact and its one I picked up on quite a while ago when I compared the Chipmaster Pro to my Boardmaster 4000.
Both of these devices test the Z80 CPU out of circuit yet the Chipmaster Pro seldom gives a PASS result where as the Boardmaster always gave me a true PASS or FAIL result.
I bring this up now as Andrew96 reminded me of this issue and has even made a short video of it here
https://www.youtube.com/watch?v=GCA_KPoa18I&feature=youtu.be
As he states, ABI refuse to fix this problem and that is just unacceptable.
Be warned before you shell out a good amount of cash on one of these devices. You can’t even add your own test without spending another load of cash on the extra software.
Im glad I never paid much for mine.
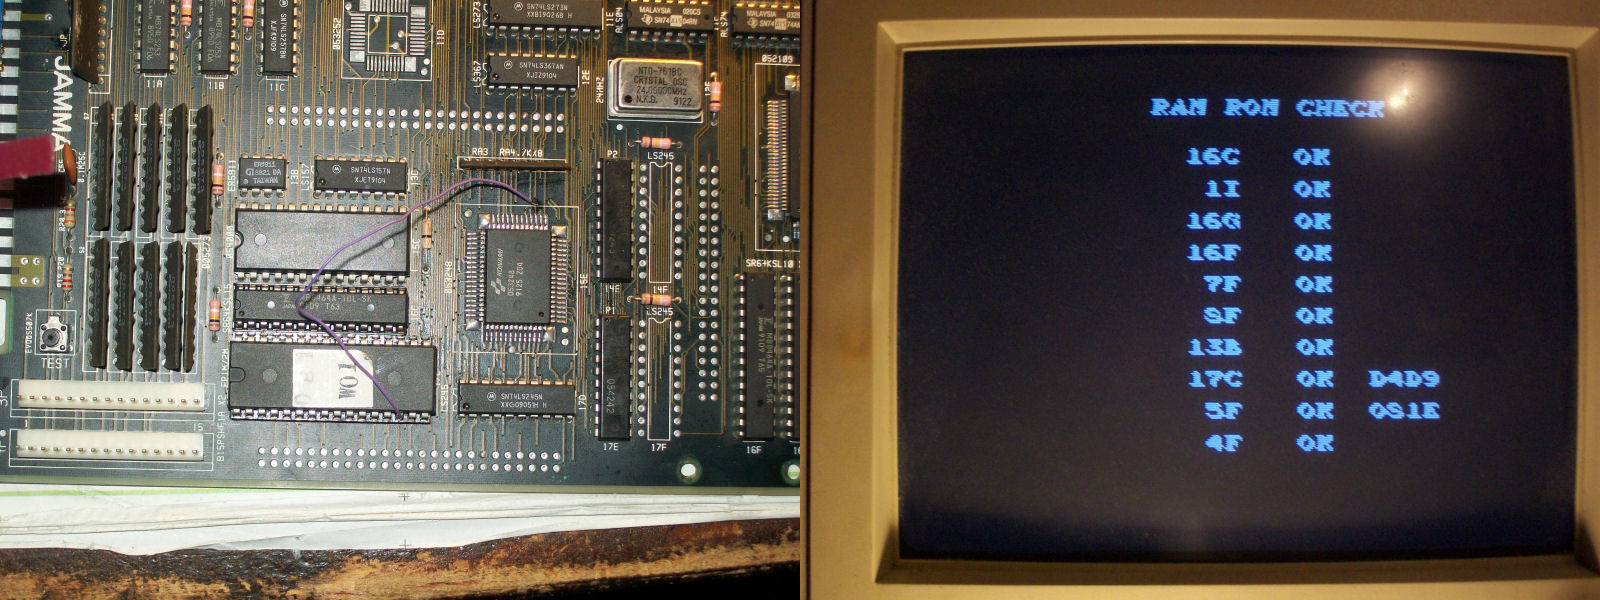
Got this original Konami Vendetta PCB from a batch of faulty boards I recently bought:
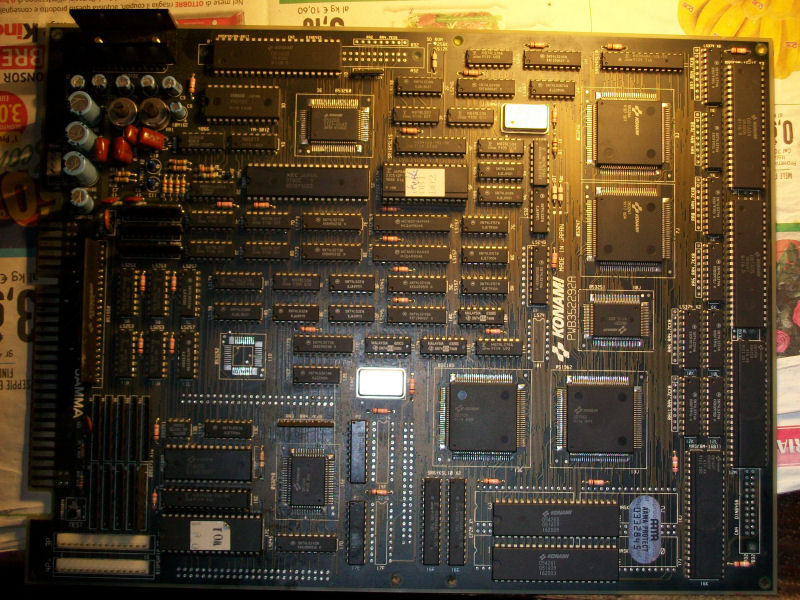
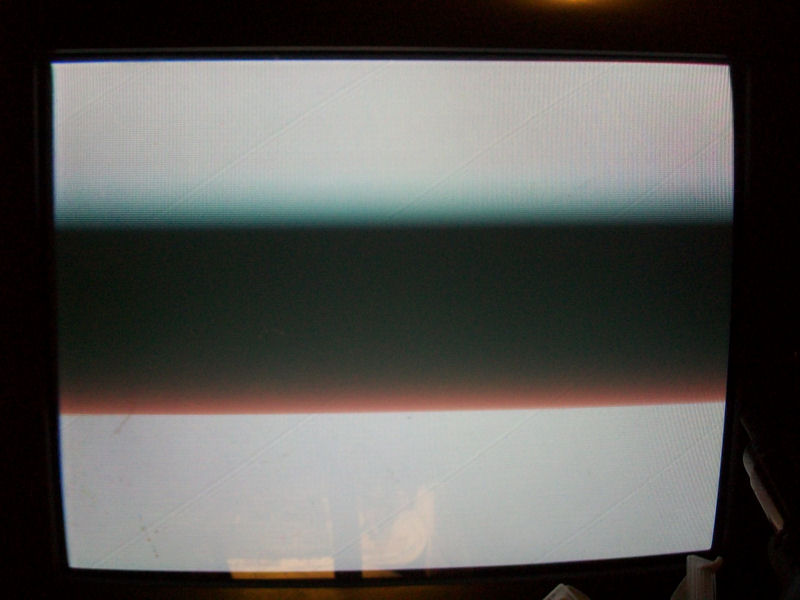
Board was really brand new as it was come out from the factory but once powered on I was greeted by a flashing white screen sign that the watchdog circuit was active and the board kept to resetting:
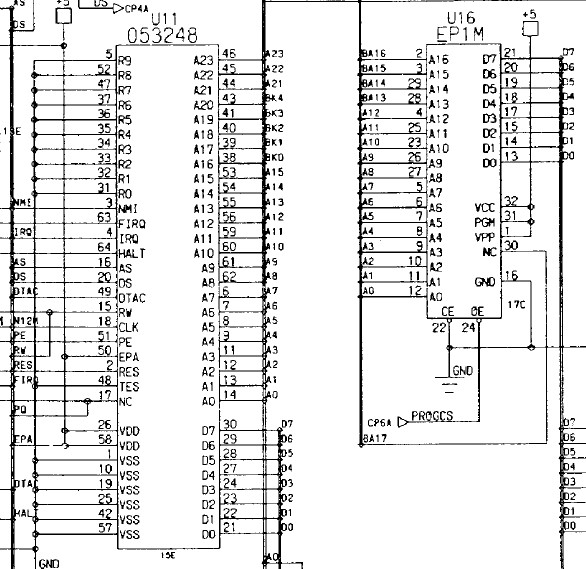
Usually the watchdog is on because there is some troubles in the main code execution.So I started with my multimeter the check the main CPU (a custom marked ‘053248’) area and found an high resistance between ‘D1’ (DATA LINE 1) of the CPU and the program ROM:
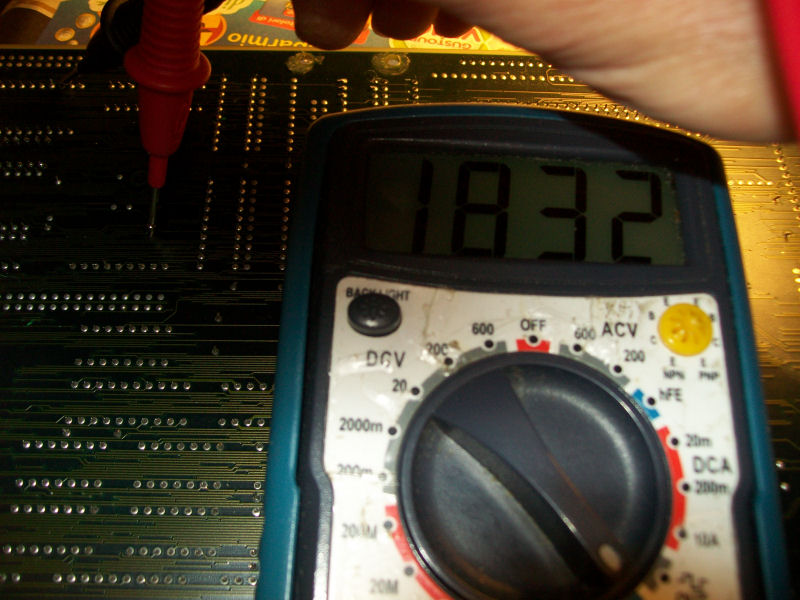
Obviously, for the proper CPU operation, all its address and data line must be daisy chained with the main code ROM as confirmed also by schematics:
So I used a provisional patch wire and board booted fine:
But external appearance matters too.So, following the path of this data line, I found the point where the track was interrupted (picture on the right was taken with USB microscope) and I patched it with some AWG30 wire:
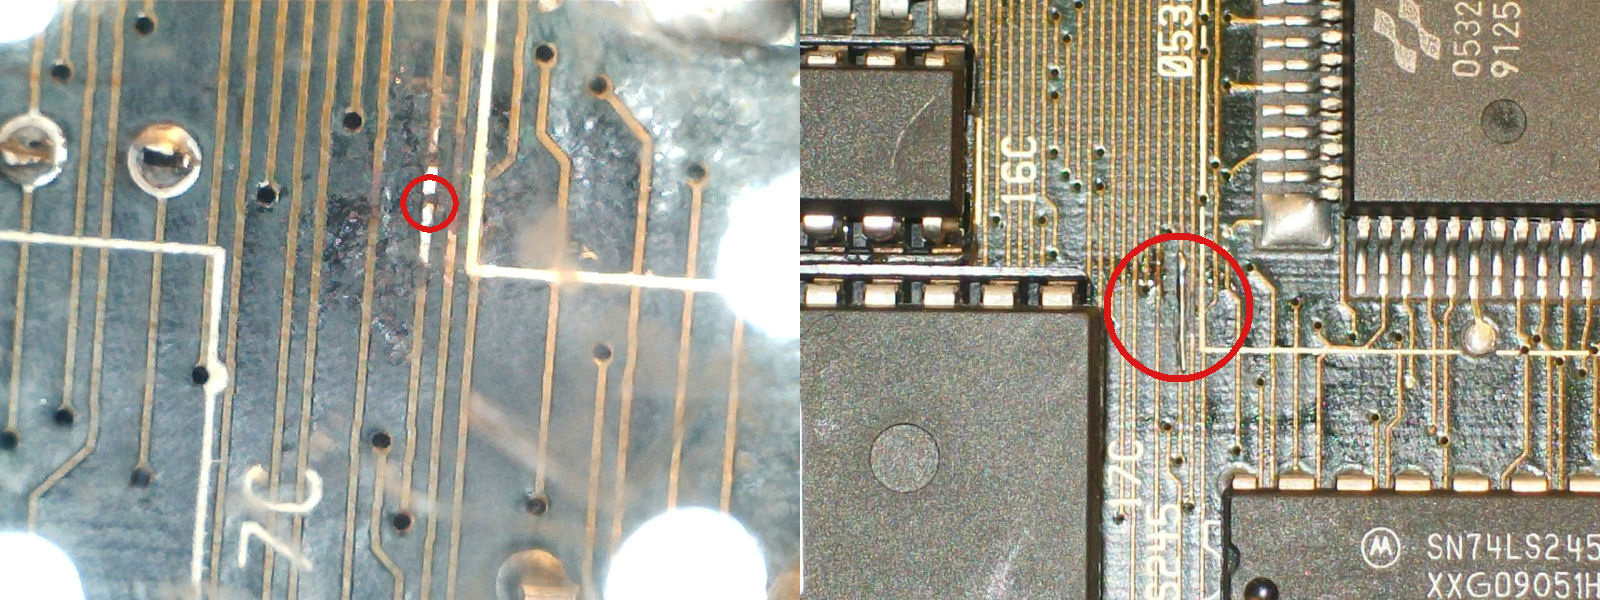
Job done.