Porchy

Cheap and easy -5v

 General  Comments Off on Cheap and easy -5v
Jul 152014
 

Its becoming more and more common for power supplies to not supply -5v.
There are devices out there like the “Negatron” that offer a nice and easy way to obtain an adjustable -5v but there is a much cheaper way of getting it providing you can do a little bit of soldering.
Intersil offer a 7660 voltage converter IC. Its an 8 pin DIP device that can be bought for under £1 from Farnell and other places.
Farnell – ICL7660

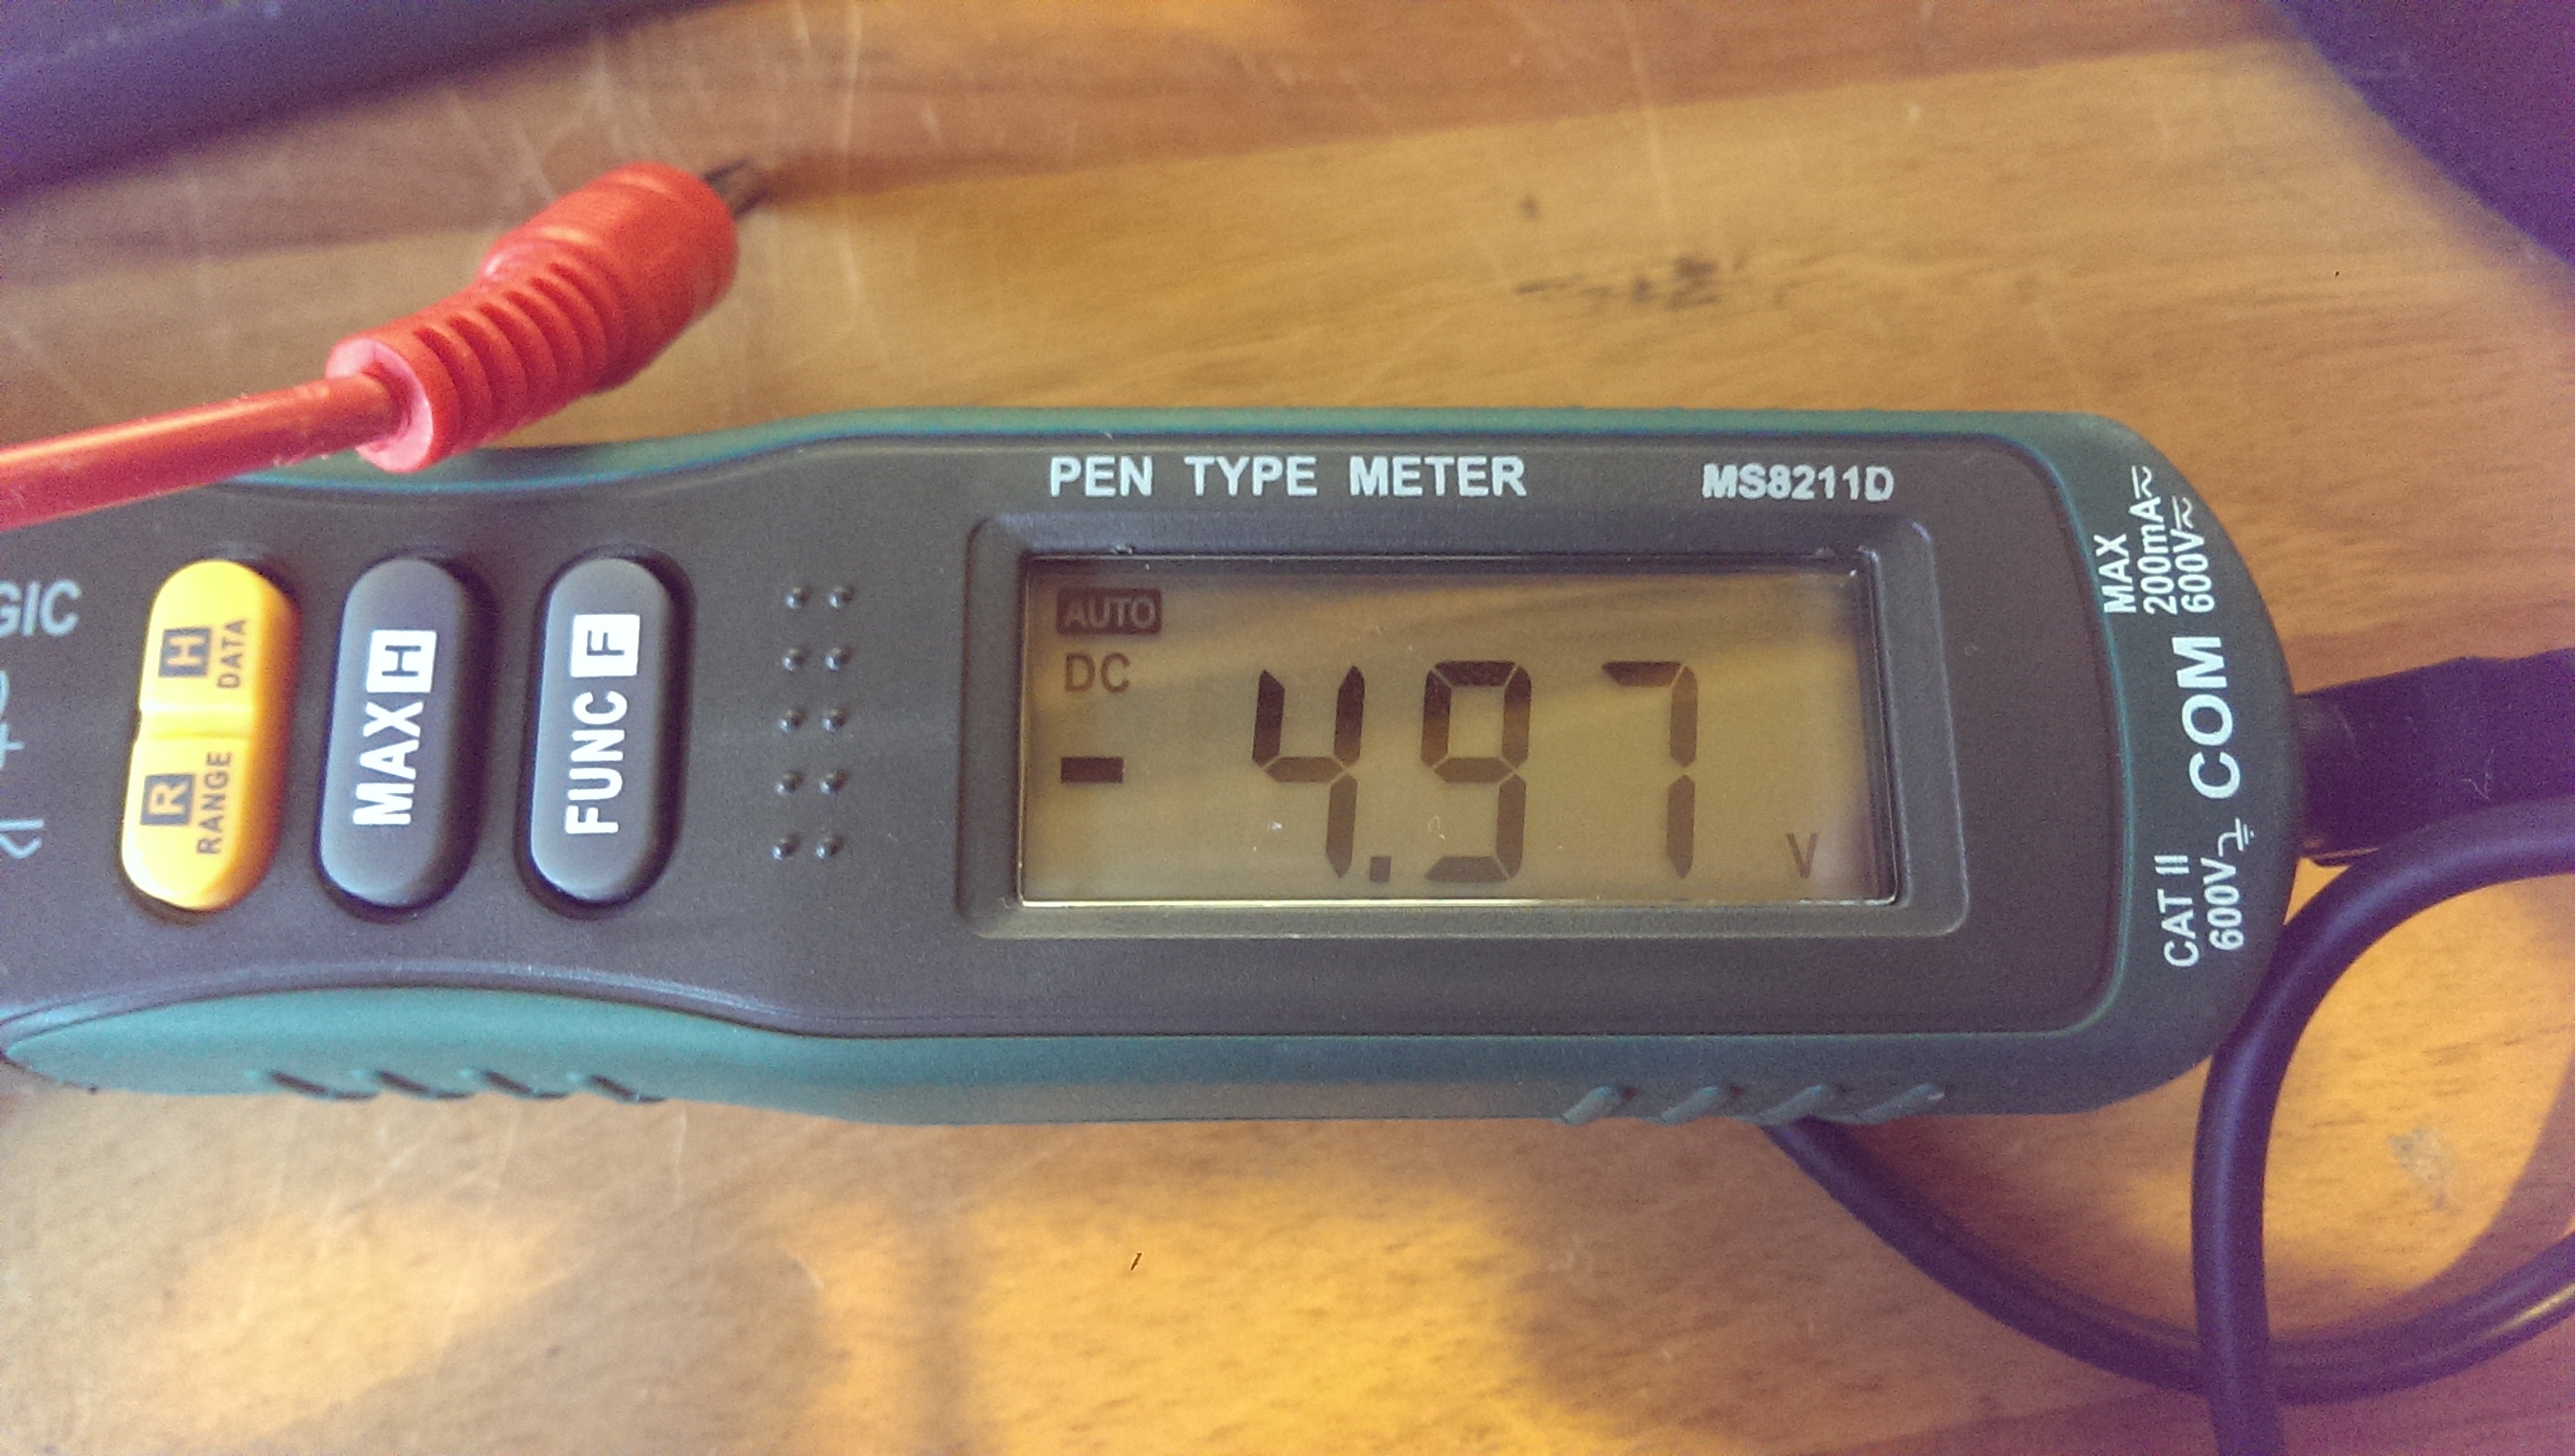
I bought a couple of these on a recent order to test and the results, as expected, are great.
This is it setup on breadboard.
IMAG0673

IMAG0674

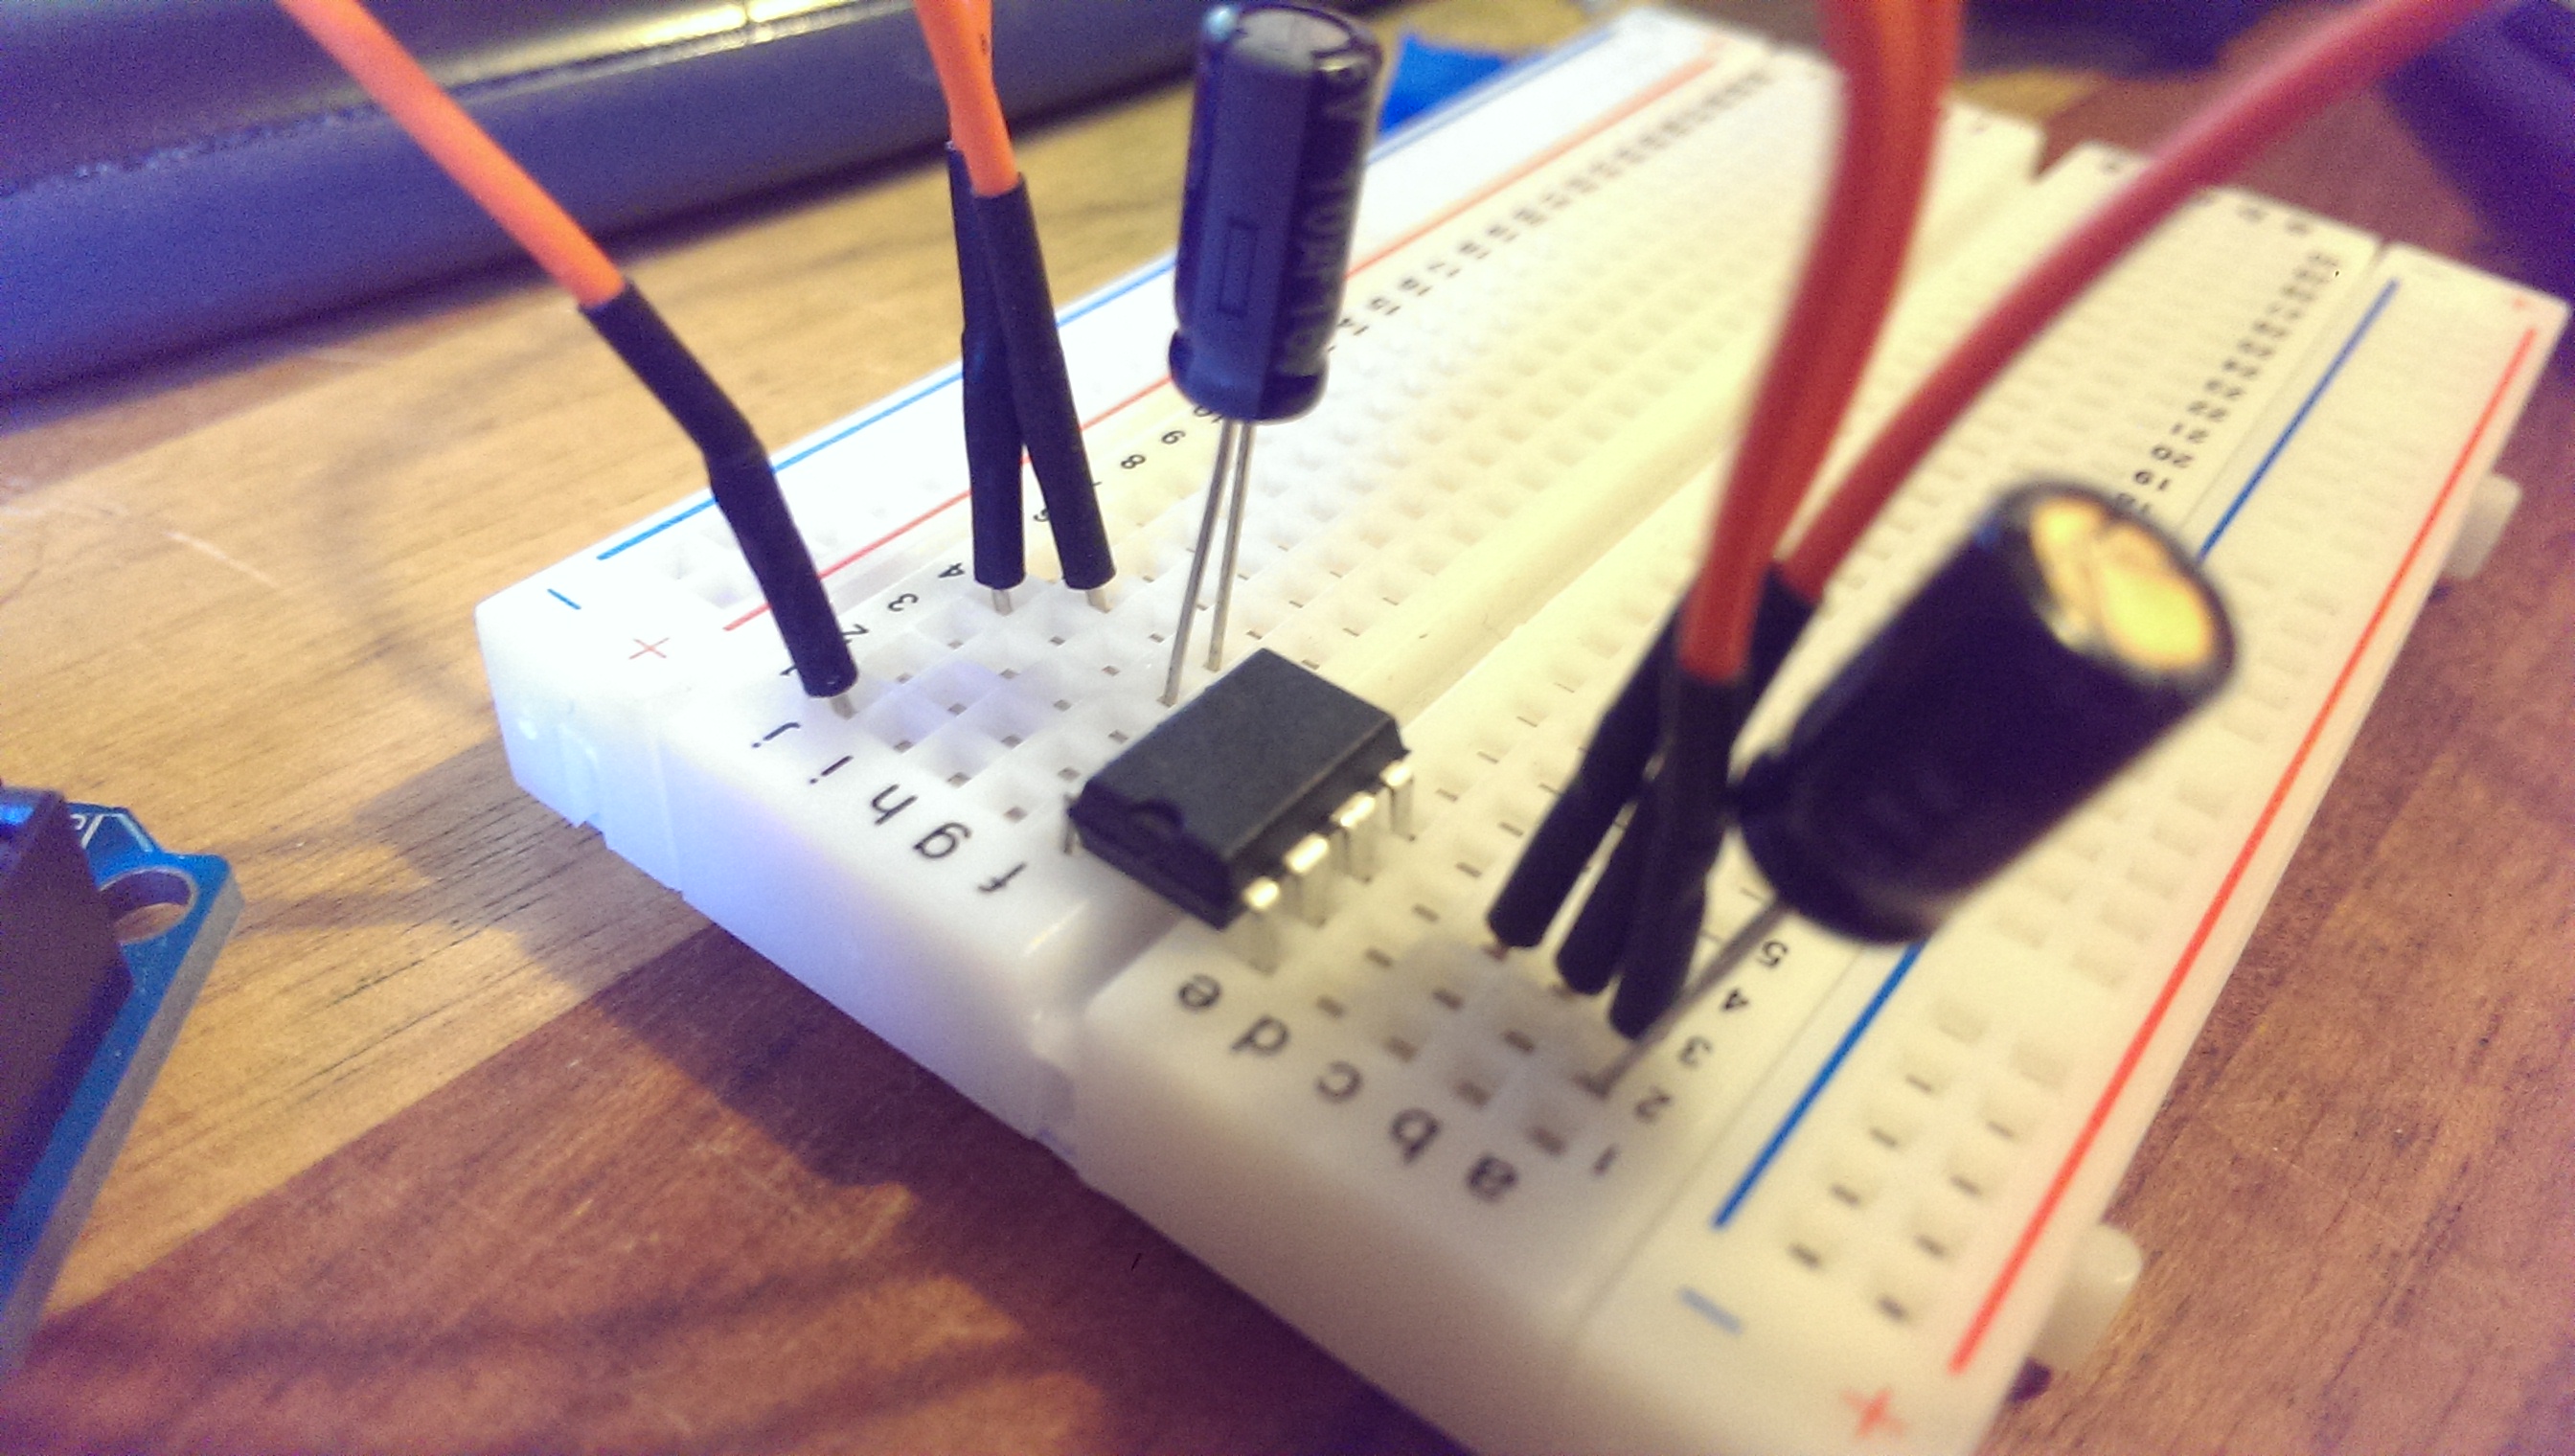
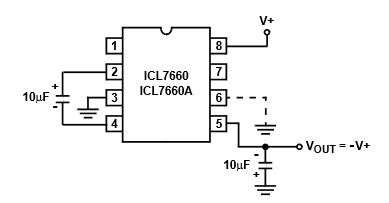
All that’s required is a +5v input, the ICL7660 IC and 2 x 10uF capacitors to get a -5v output. Add a variable resistor into the mix and you have a fully adjustable device for very cheap.
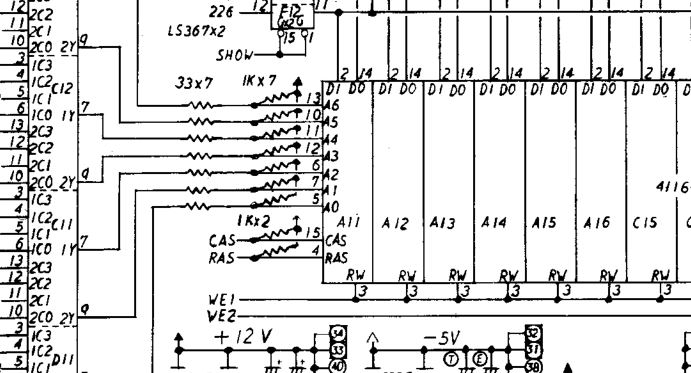
Here is the diagram lifted straight from the datasheet to show how simple this is.
icl7660

 Posted by at 9:16 pm

Gradius 2 PAL dumps added

 PAL Updates  Comments Off on Gradius 2 PAL dumps added
Jul 132014
 

I dumped 3 PAL chips found in a Gradius 2 board set.
The board set is not fully operational so I have not marked them as tested in case one of these chips is at fault.
I have also dumped the PLS173 chip on this board but it looks very suspicious so I have not included it. If anyone has a dump of this chip or its equations I would be interested in seeing it.

Thanks

 Posted by at 2:22 pm

Juno First repair log #3

 PCB Repair Logs, Repair Logs  Comments Off on Juno First repair log #3
Jun 262014
 

Third repair log from the batch of Juno First boards.
On power up the board was completely dead. No clocks were present on the CPU or many other IC’s.
As this is a bootleg board the available schematics do not fully apply and the clock circuit is normally handled by custom chips so this was a bit of a learning experience.
To help in dealing with this problem I started making my own schematics up.
junobl

Using a logic probe I could see that the outputs of the 74LS161 @ H14 were all HIGH. As there is no clock present to this chip it should not have counted anything at this point and they should all be LOW. This meant to the board was booting up in an incorrect state and the clock circuit was never starting.
I desoldered and replaced the offending 161 chip.
IMAG0616

The clocks were now all present but I just got a static blue screen and the watchdog was constantly resetting the system.
Using my in circuit Arduino tester I knew the ROMs could all be read correctly by the CPU. I also knew all the program RAMs were fine.
Replacing the 6809 CPU allowed the game to boot properly.

Next problem was the sound or lack of it.
The sound CPU is a good old Z80 so I fitted the Fluke and did a ROM check. This reported back an incorrect signature and when I removed the ROM I see this
IMAG0618

The VCC pin was missing. I soldered a new pin onto this and this board is fully fixed.

The last bootleg board has been a major pain and at this point in time I have admitted defeat with it. I have also been harvesting parts from it to fix the others so it will be written off.

Juno First repair log #2

 PCB Repair Logs, Repair Logs  Comments Off on Juno First repair log #2
Jun 152014
 

So here is the second repair log.
Pretty simple this one but I never took any pictures of the actual fault so Ive taken a snapshot of the event in MAME to show it.

The game plays as normal but when the blue ball enemies spawn into the game the froze up on screen and did nothing as circled in red in the picture below.
juno2

On my visual inspection I noticed a 1K pull up resistor array next to the bank of 4116 RAM chips what cracked in half.
juno2-1

Replacing this fixed the fault.

I did initially think there was another fault as the ship movement in attract mode seemed a bit strange but after checking in MAME this is a characteristic of the non Gottlieb version. In the Gottlieb version this behavior is not present.